Home Project - Part 3
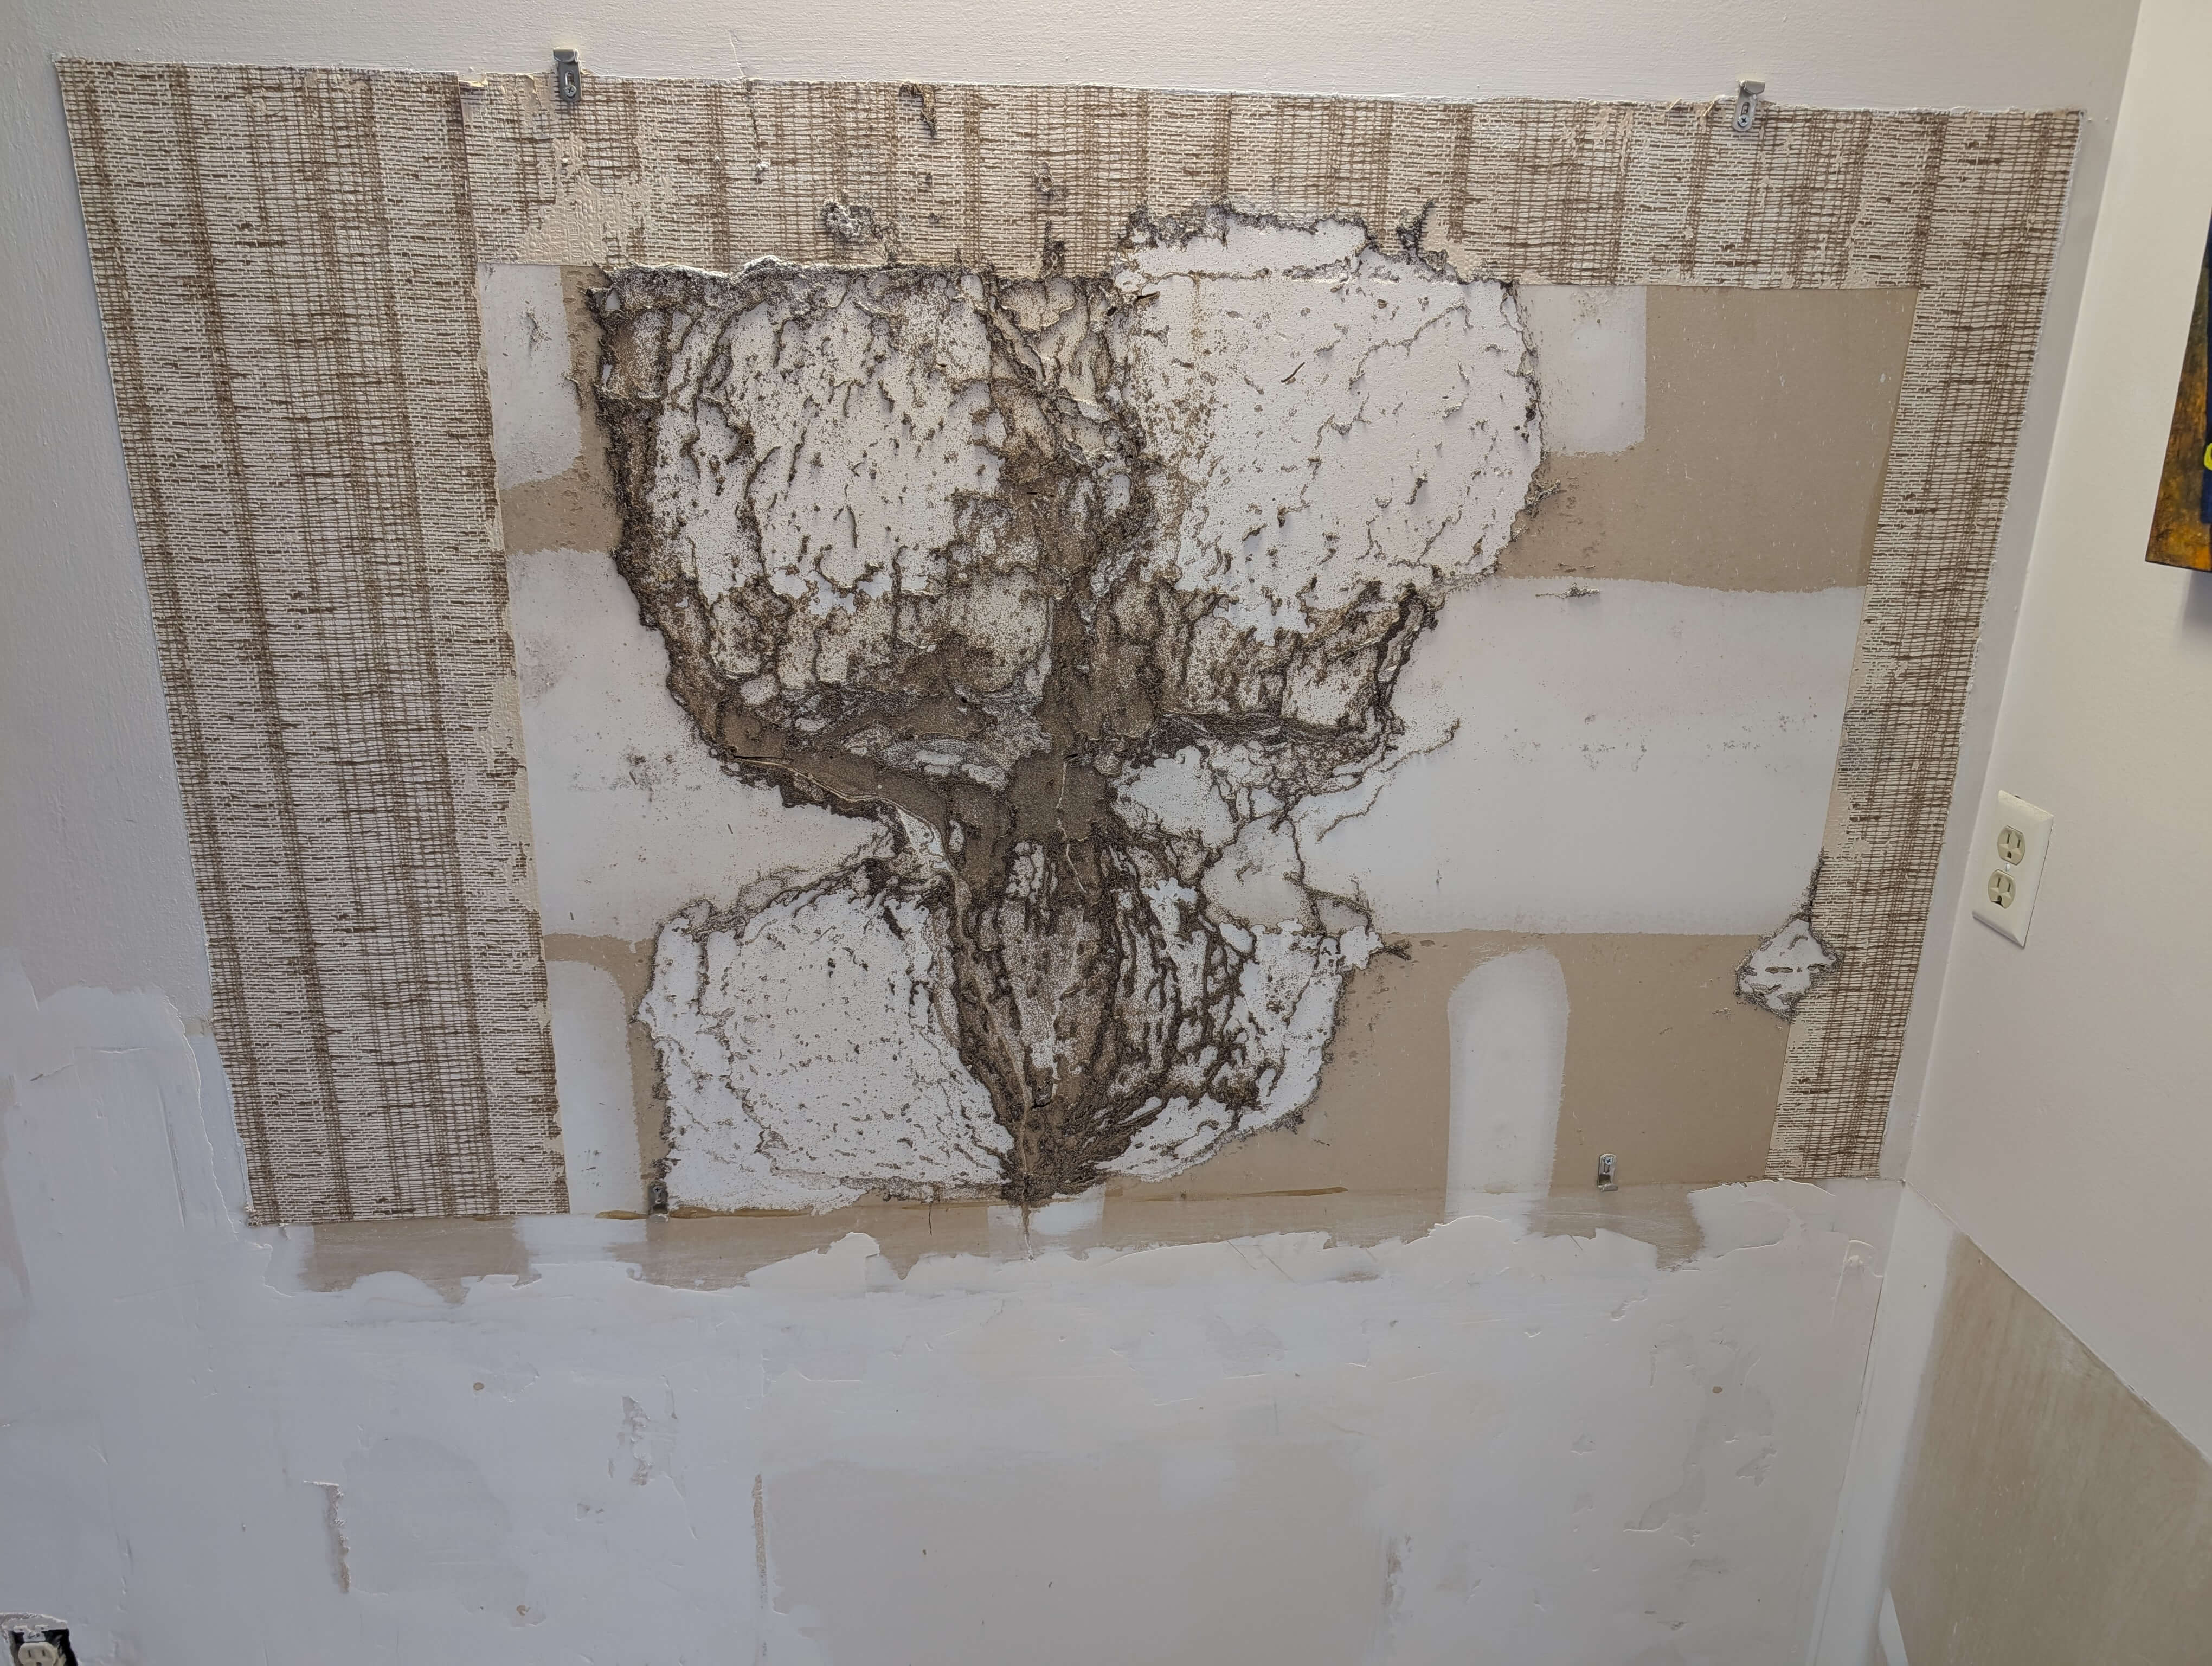
A few months ago Alyson and I started removing a vanity in the bedroom and did not realize the endeavor we had started. Part 1 and Part 2 can be found for a refresher, but we start Part 3 taking down a mirror after roughly patching some wall to find once again more termite damage. This time all the damage was more top layer away from the studs so it just took some sanding and drywall patching to finish up that area.
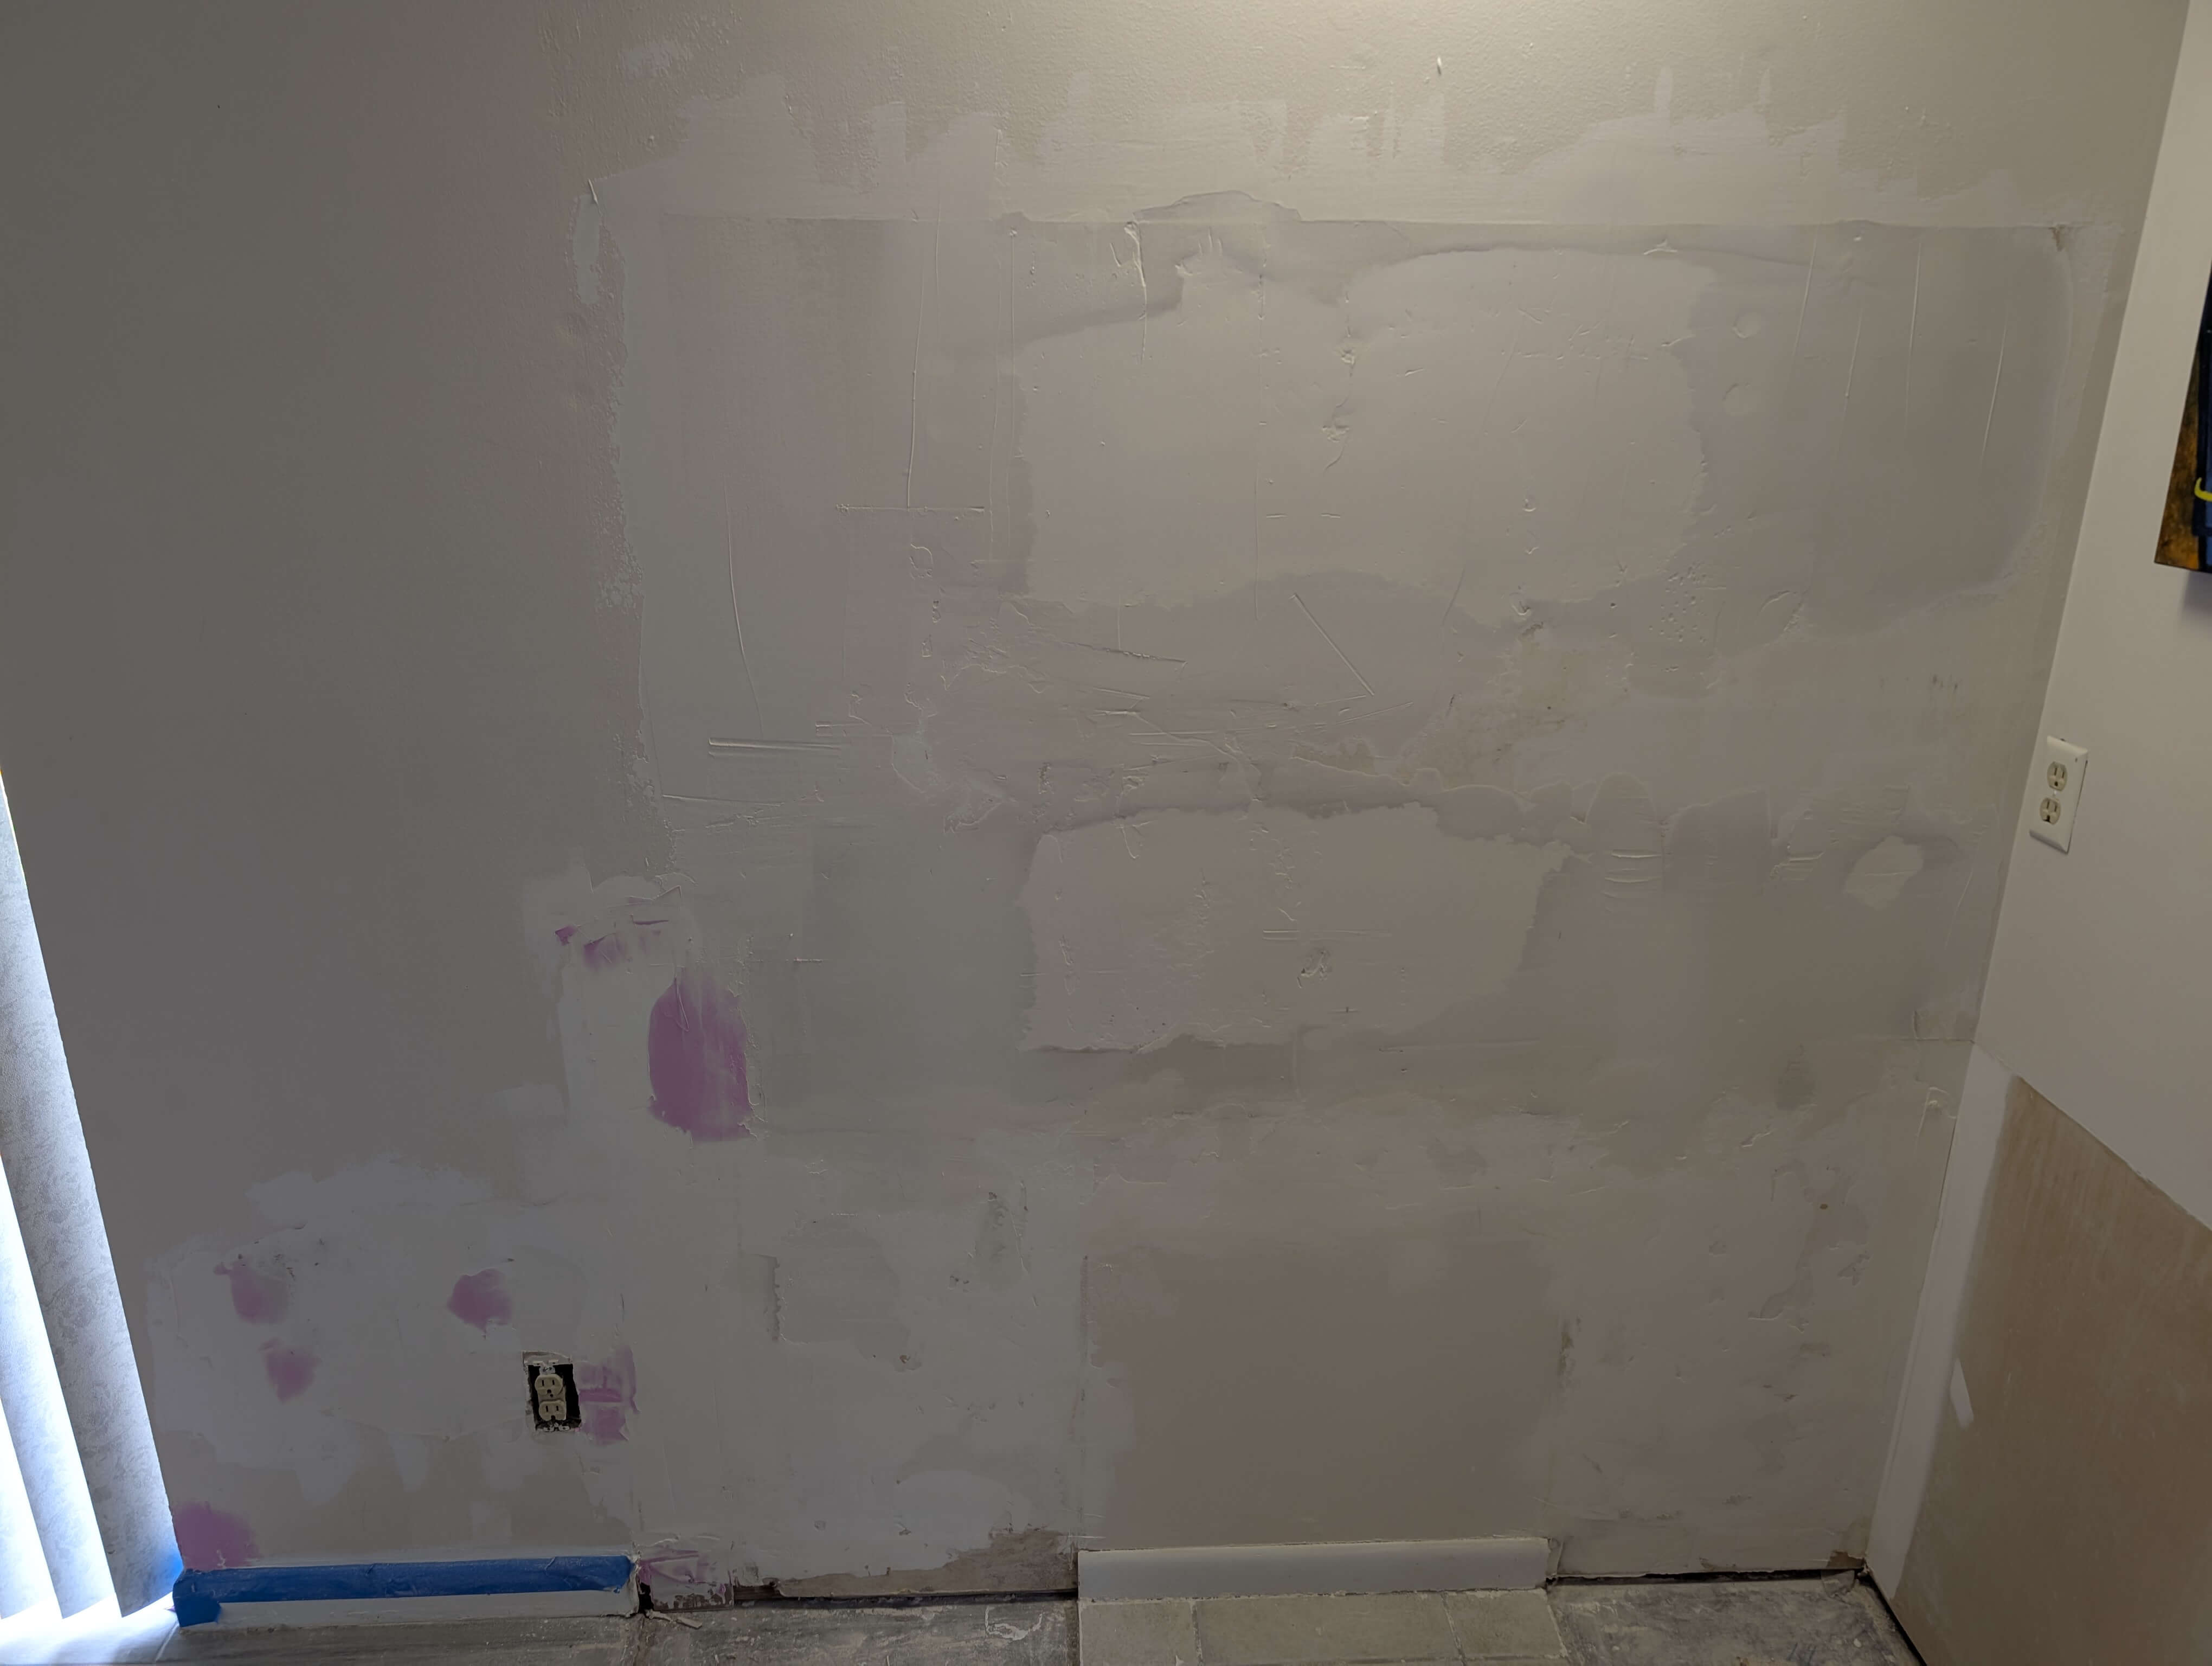
Doing drywall with a tiny 1ft knife was not the easiest when trying to basically do an entire section of wall - you could tell how uneven the work was even after multiple layers of drywall & sanding. So we decided to paint the whole room and move onward to the tile situation before touching it up further.
As learned in Part 2 it was a bit upsetting to find that some furniture was laying against the concrete slab instead of tile. Perhaps that is entirely normal, but a 20+ year old home didn't have any remaining tiles of that color. It seemed tile matching was a service many companies do, but knowing our newer tile was bought at floor & decor down the street we had an unlimited supply to replace with that version.
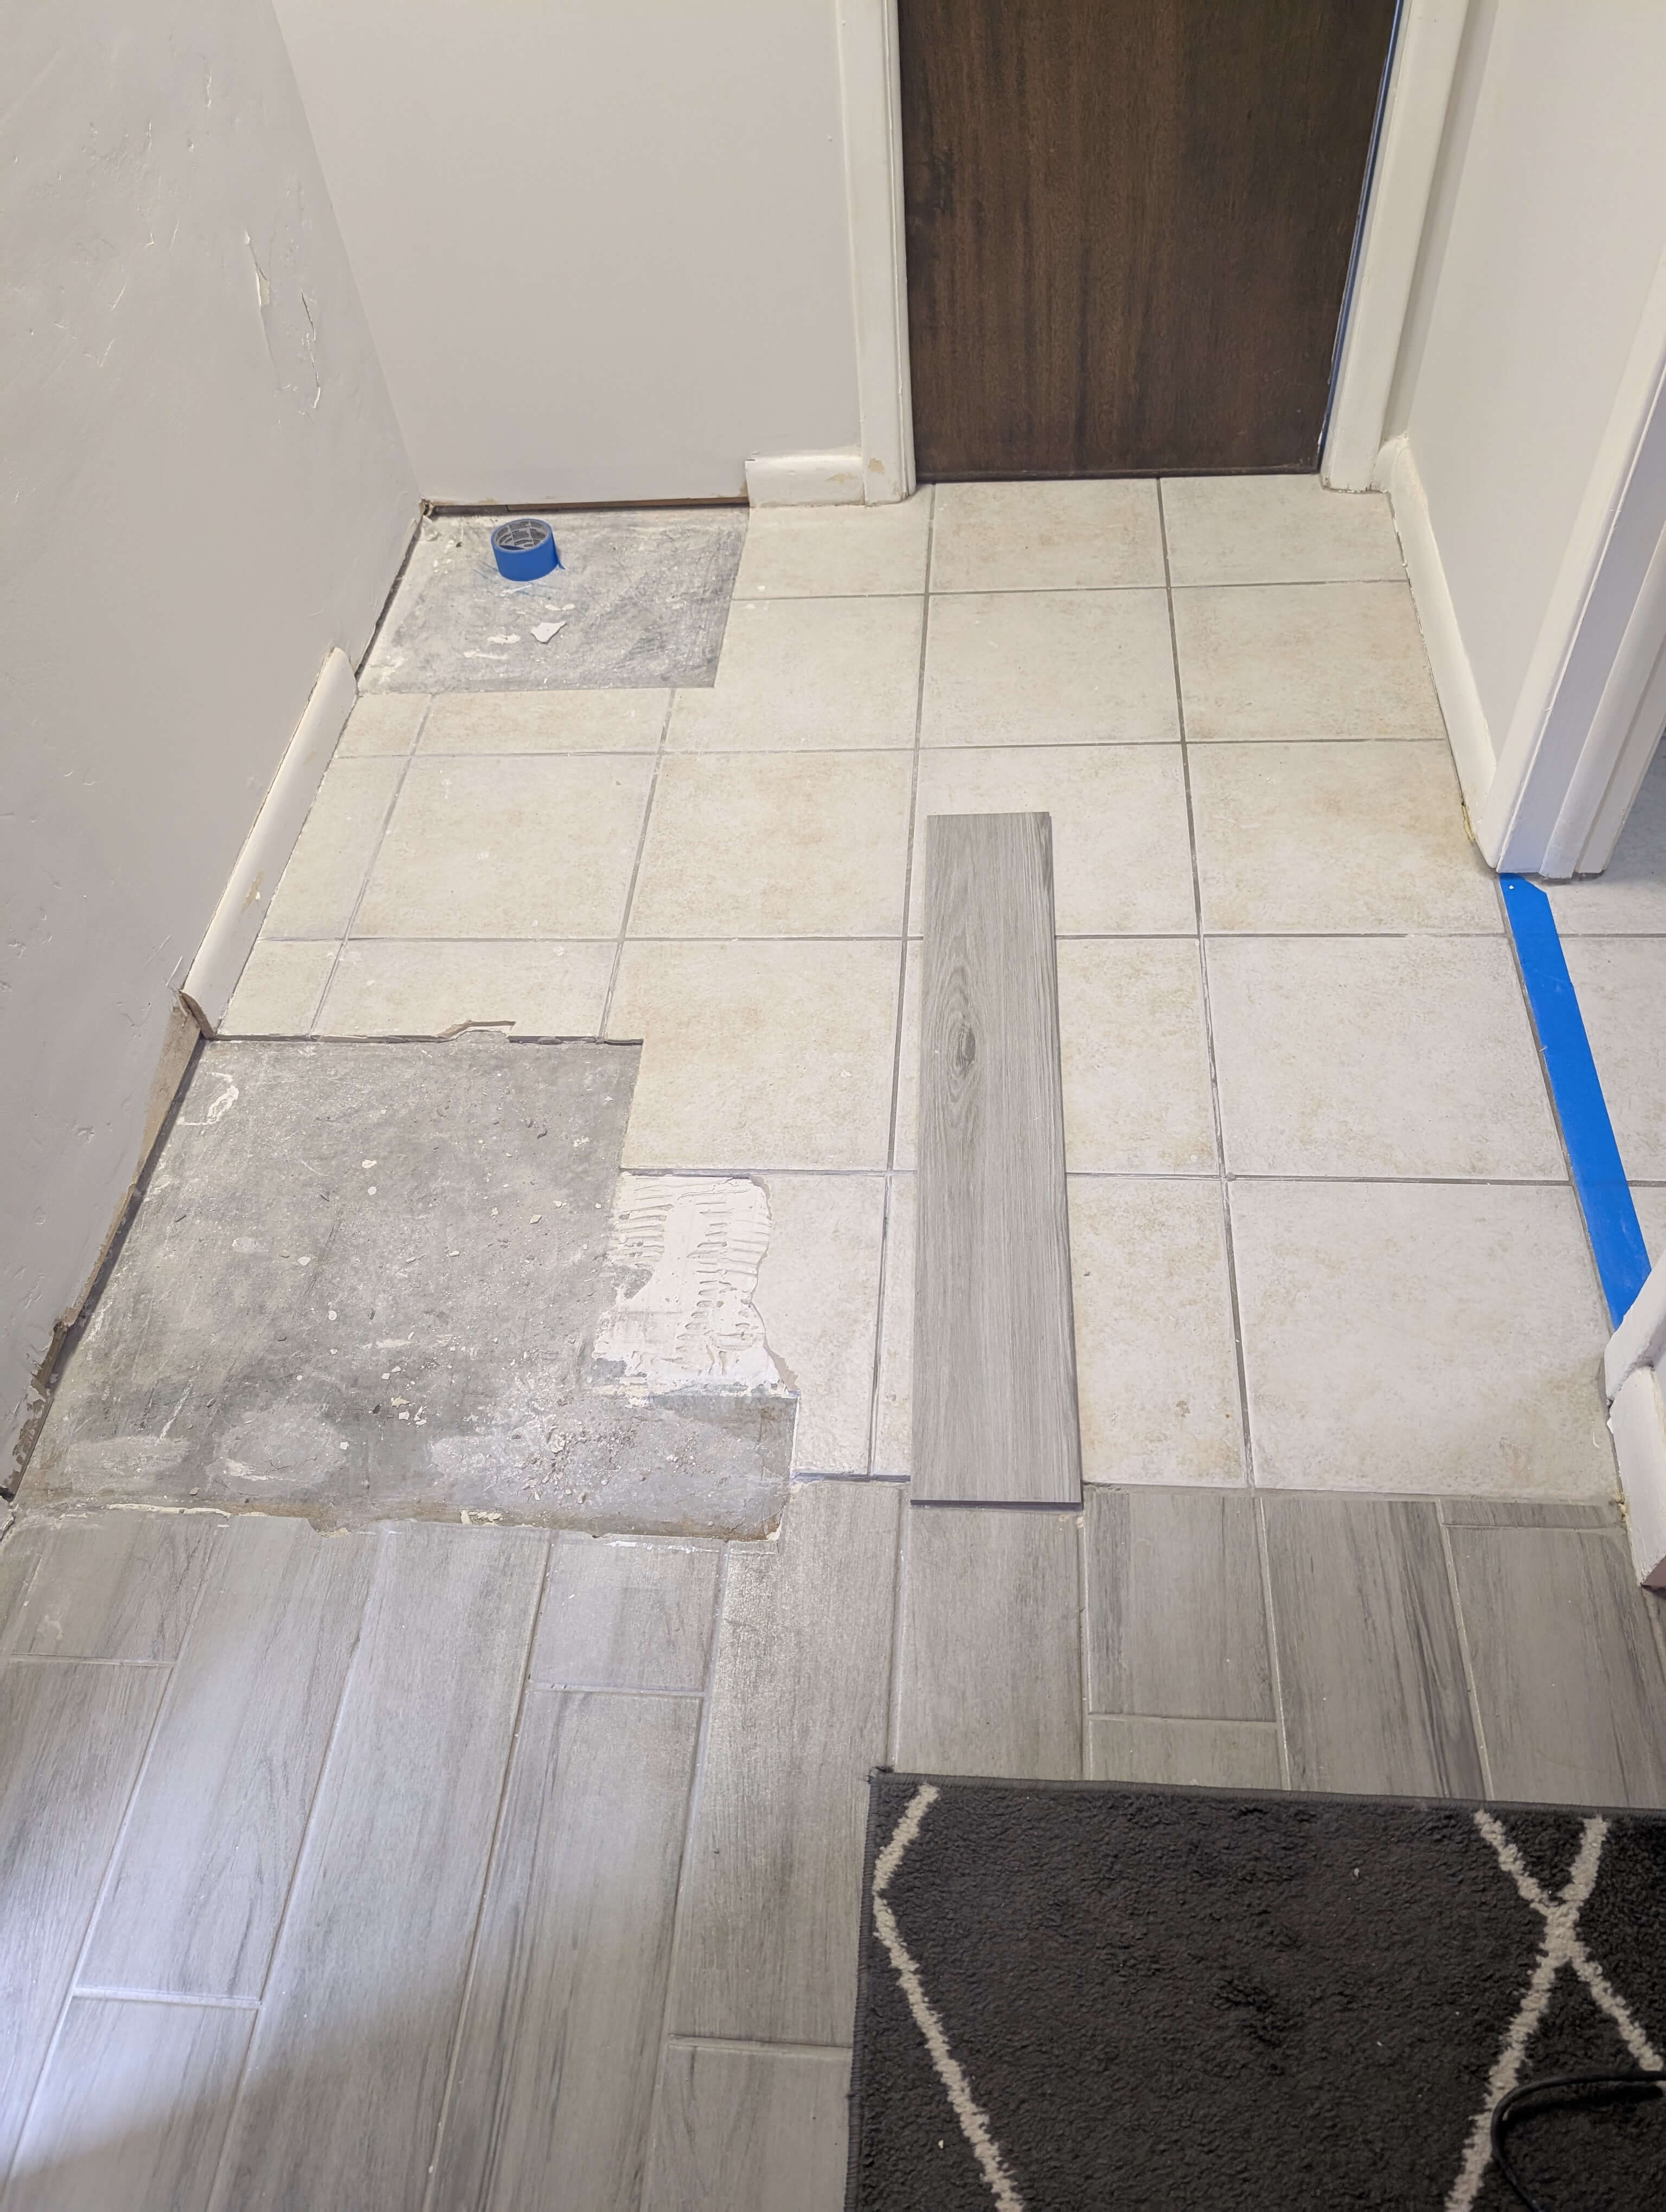
Unfortunately we didn't realize the monumental effort it would take to remove the old tile without the proper machinery. An hour of work with manual tools and the best work we had was 2/3 of one tile removed without the mortar gone. At this point with this project hitting the 2 month mark we decided to fold and hire someone off TaskRabbit.
Looking back it was an expensive endeavor just picking the best person off TaskRabbit, especially when TaskRabbit adds a $26.60/hr rate for "trust and support fees". I didn't really like the overhead that they put on the service, but had an excellent experience with the hired help who in a short 30 minute period had ripped up the entire old tile, including the mortar.
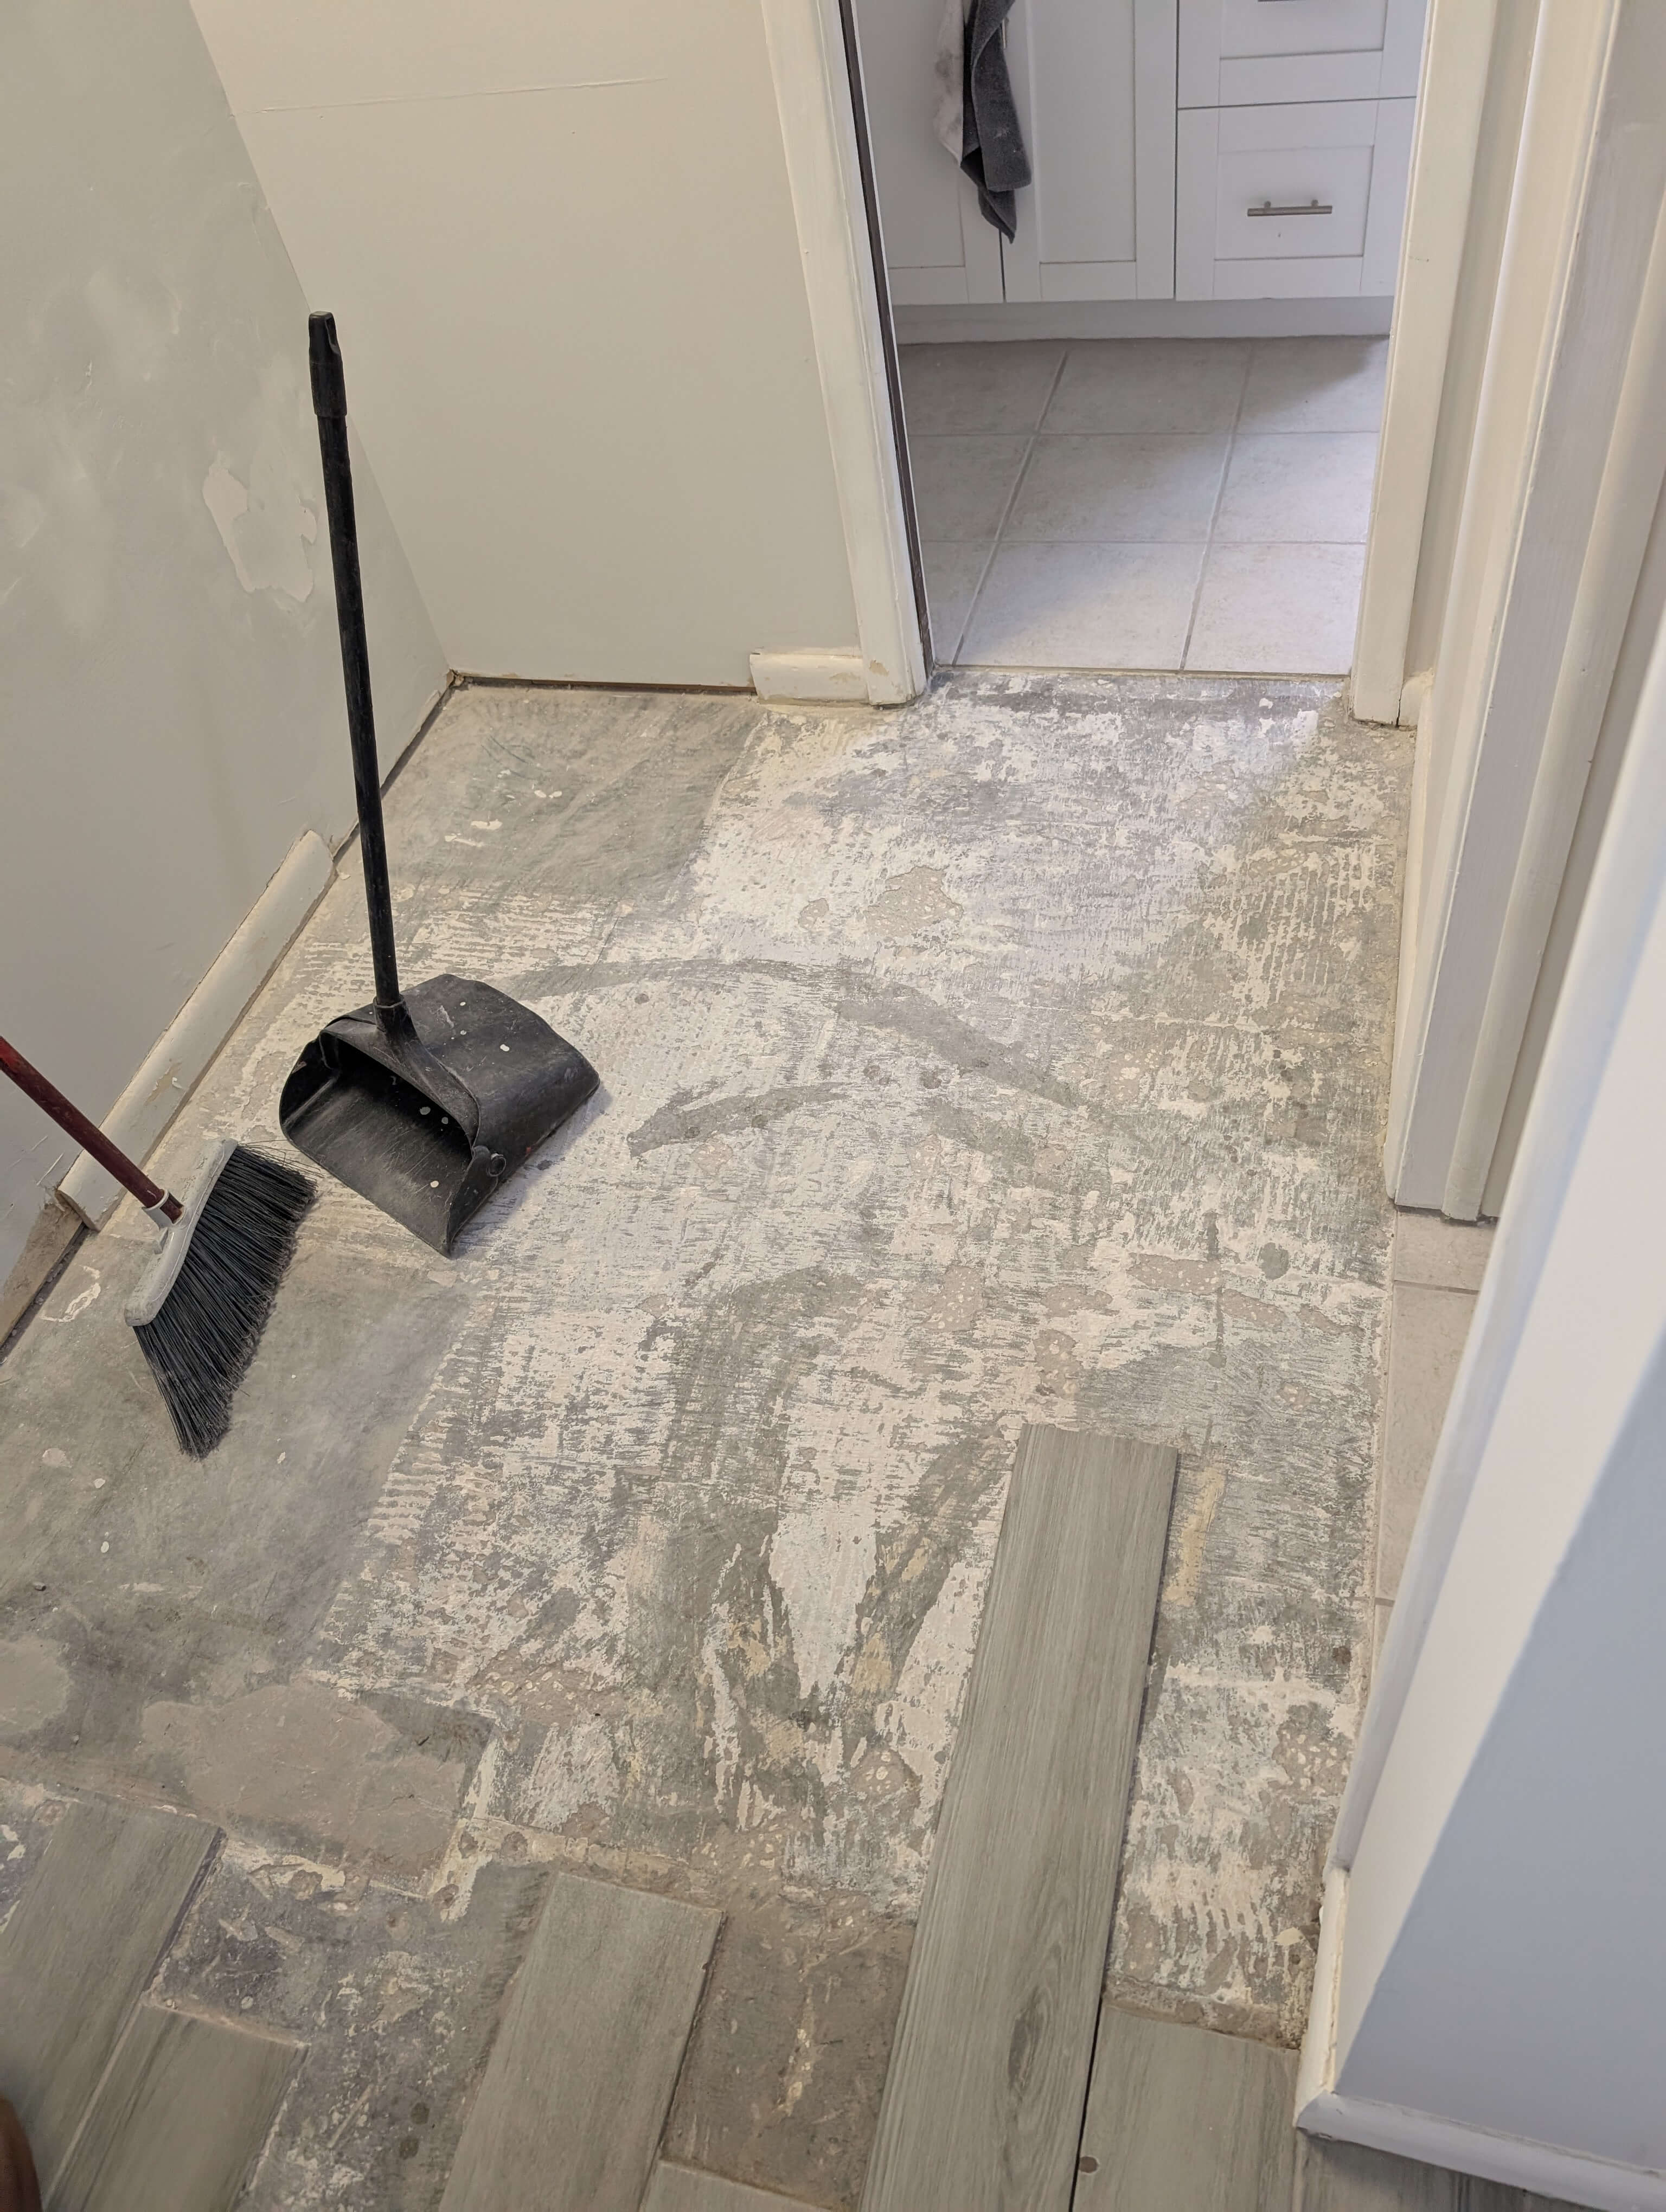
This progress was amazing to see - something we had spent hours on and made no progress was almost completed by one guy in 1/10 the time. I had no mortar so he even went the next mile and went out to the store and came back with the needed material while I worked.

As he ended his work for that day he recommended it sit for 48 hours before he grouted the lines. We were excited to see this project finally nearing the end and as a few days passed we re-hired our same TaskRabbit guy. This time we did it through regular text messages bypassing the heavy fees that TaskRabbit had.
It didn't take long on his 2nd visit with a quick grout process and our little vanity corner was looking great.
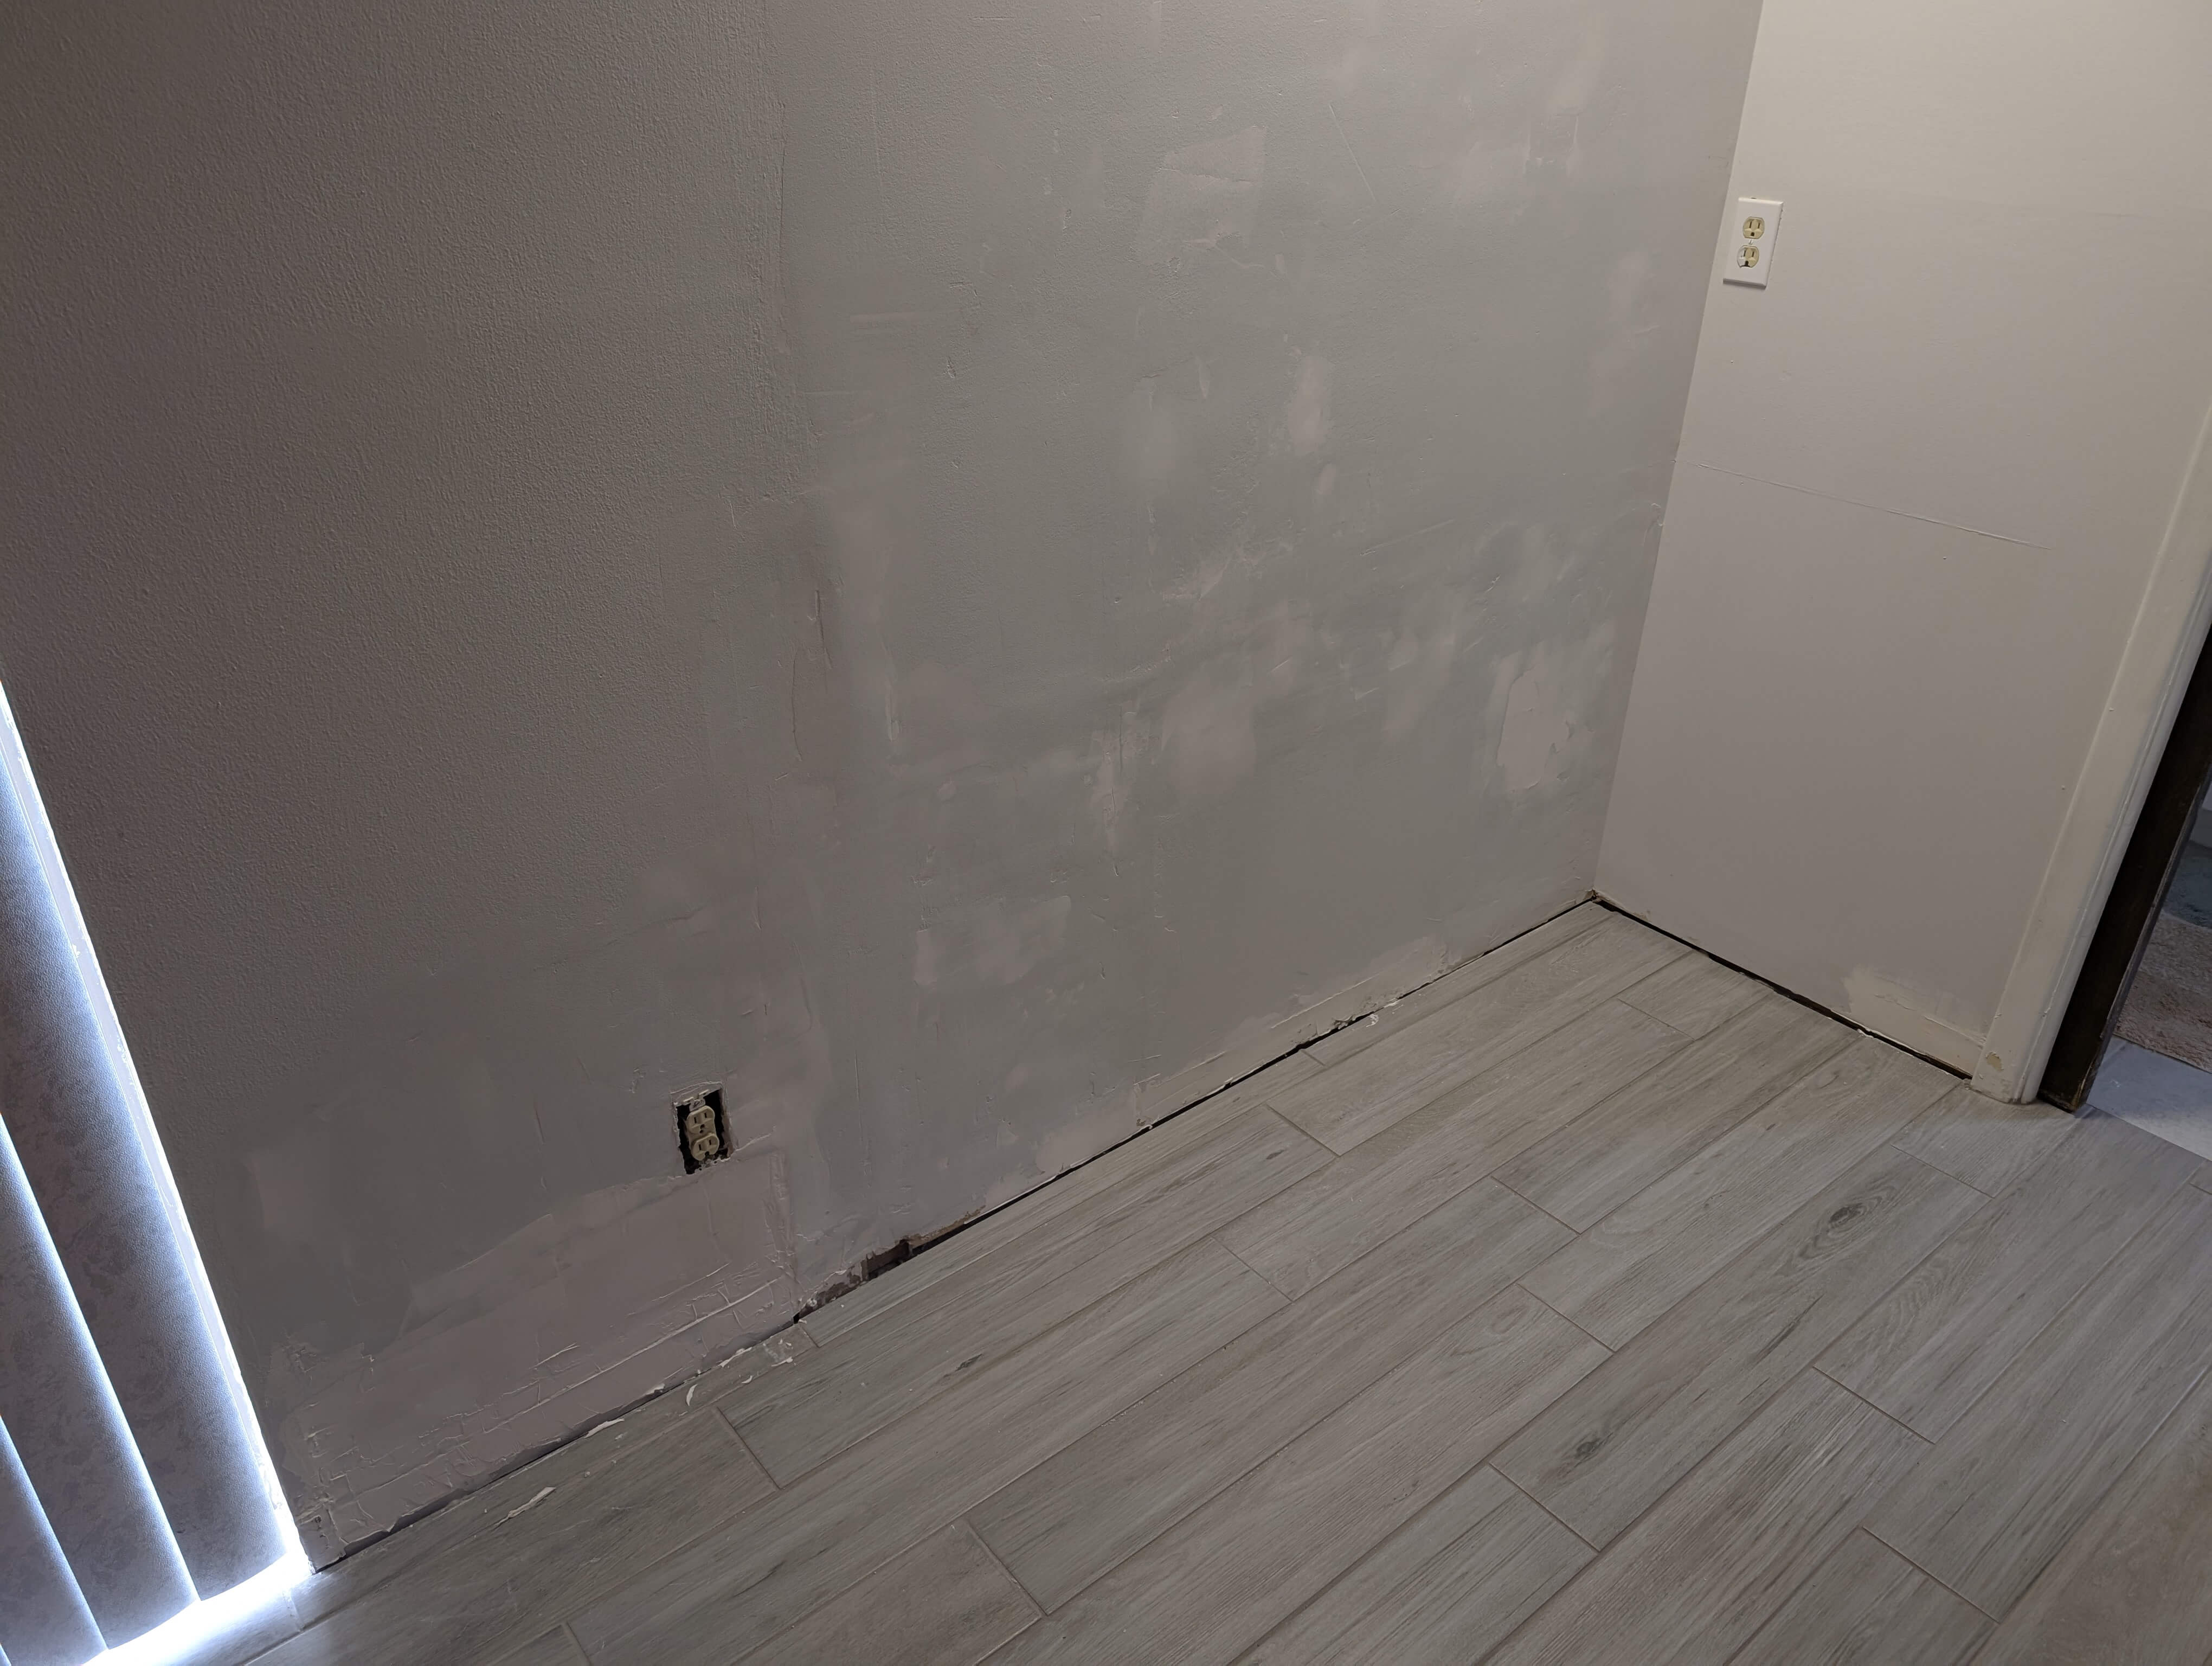
The floor now looked like the rest of bedroom, but removing the baseboards (since termite damage) did a number on the drywall. So we had to cut a few tiny pieces of drywall and do some repair until it looked like the photo above. I was hoping once we sanded it down and painted that it would look perfect, but first we had to handle the baseboards.
Knowing I'd never replaced a baseboard it was time to research. We learned we could go to Home Depot and they would cut baseboards to match our lengths for us. So we triple measured all 3 paths we needed and went off to Home Depot to buy some baseboards. As we quickly learned this was a "on your own" cutting of baseboards with a manual saw and nothing fancy.
We headed home with 3 cut pieces of wood with a little adapter to cut the angles and line everything up.
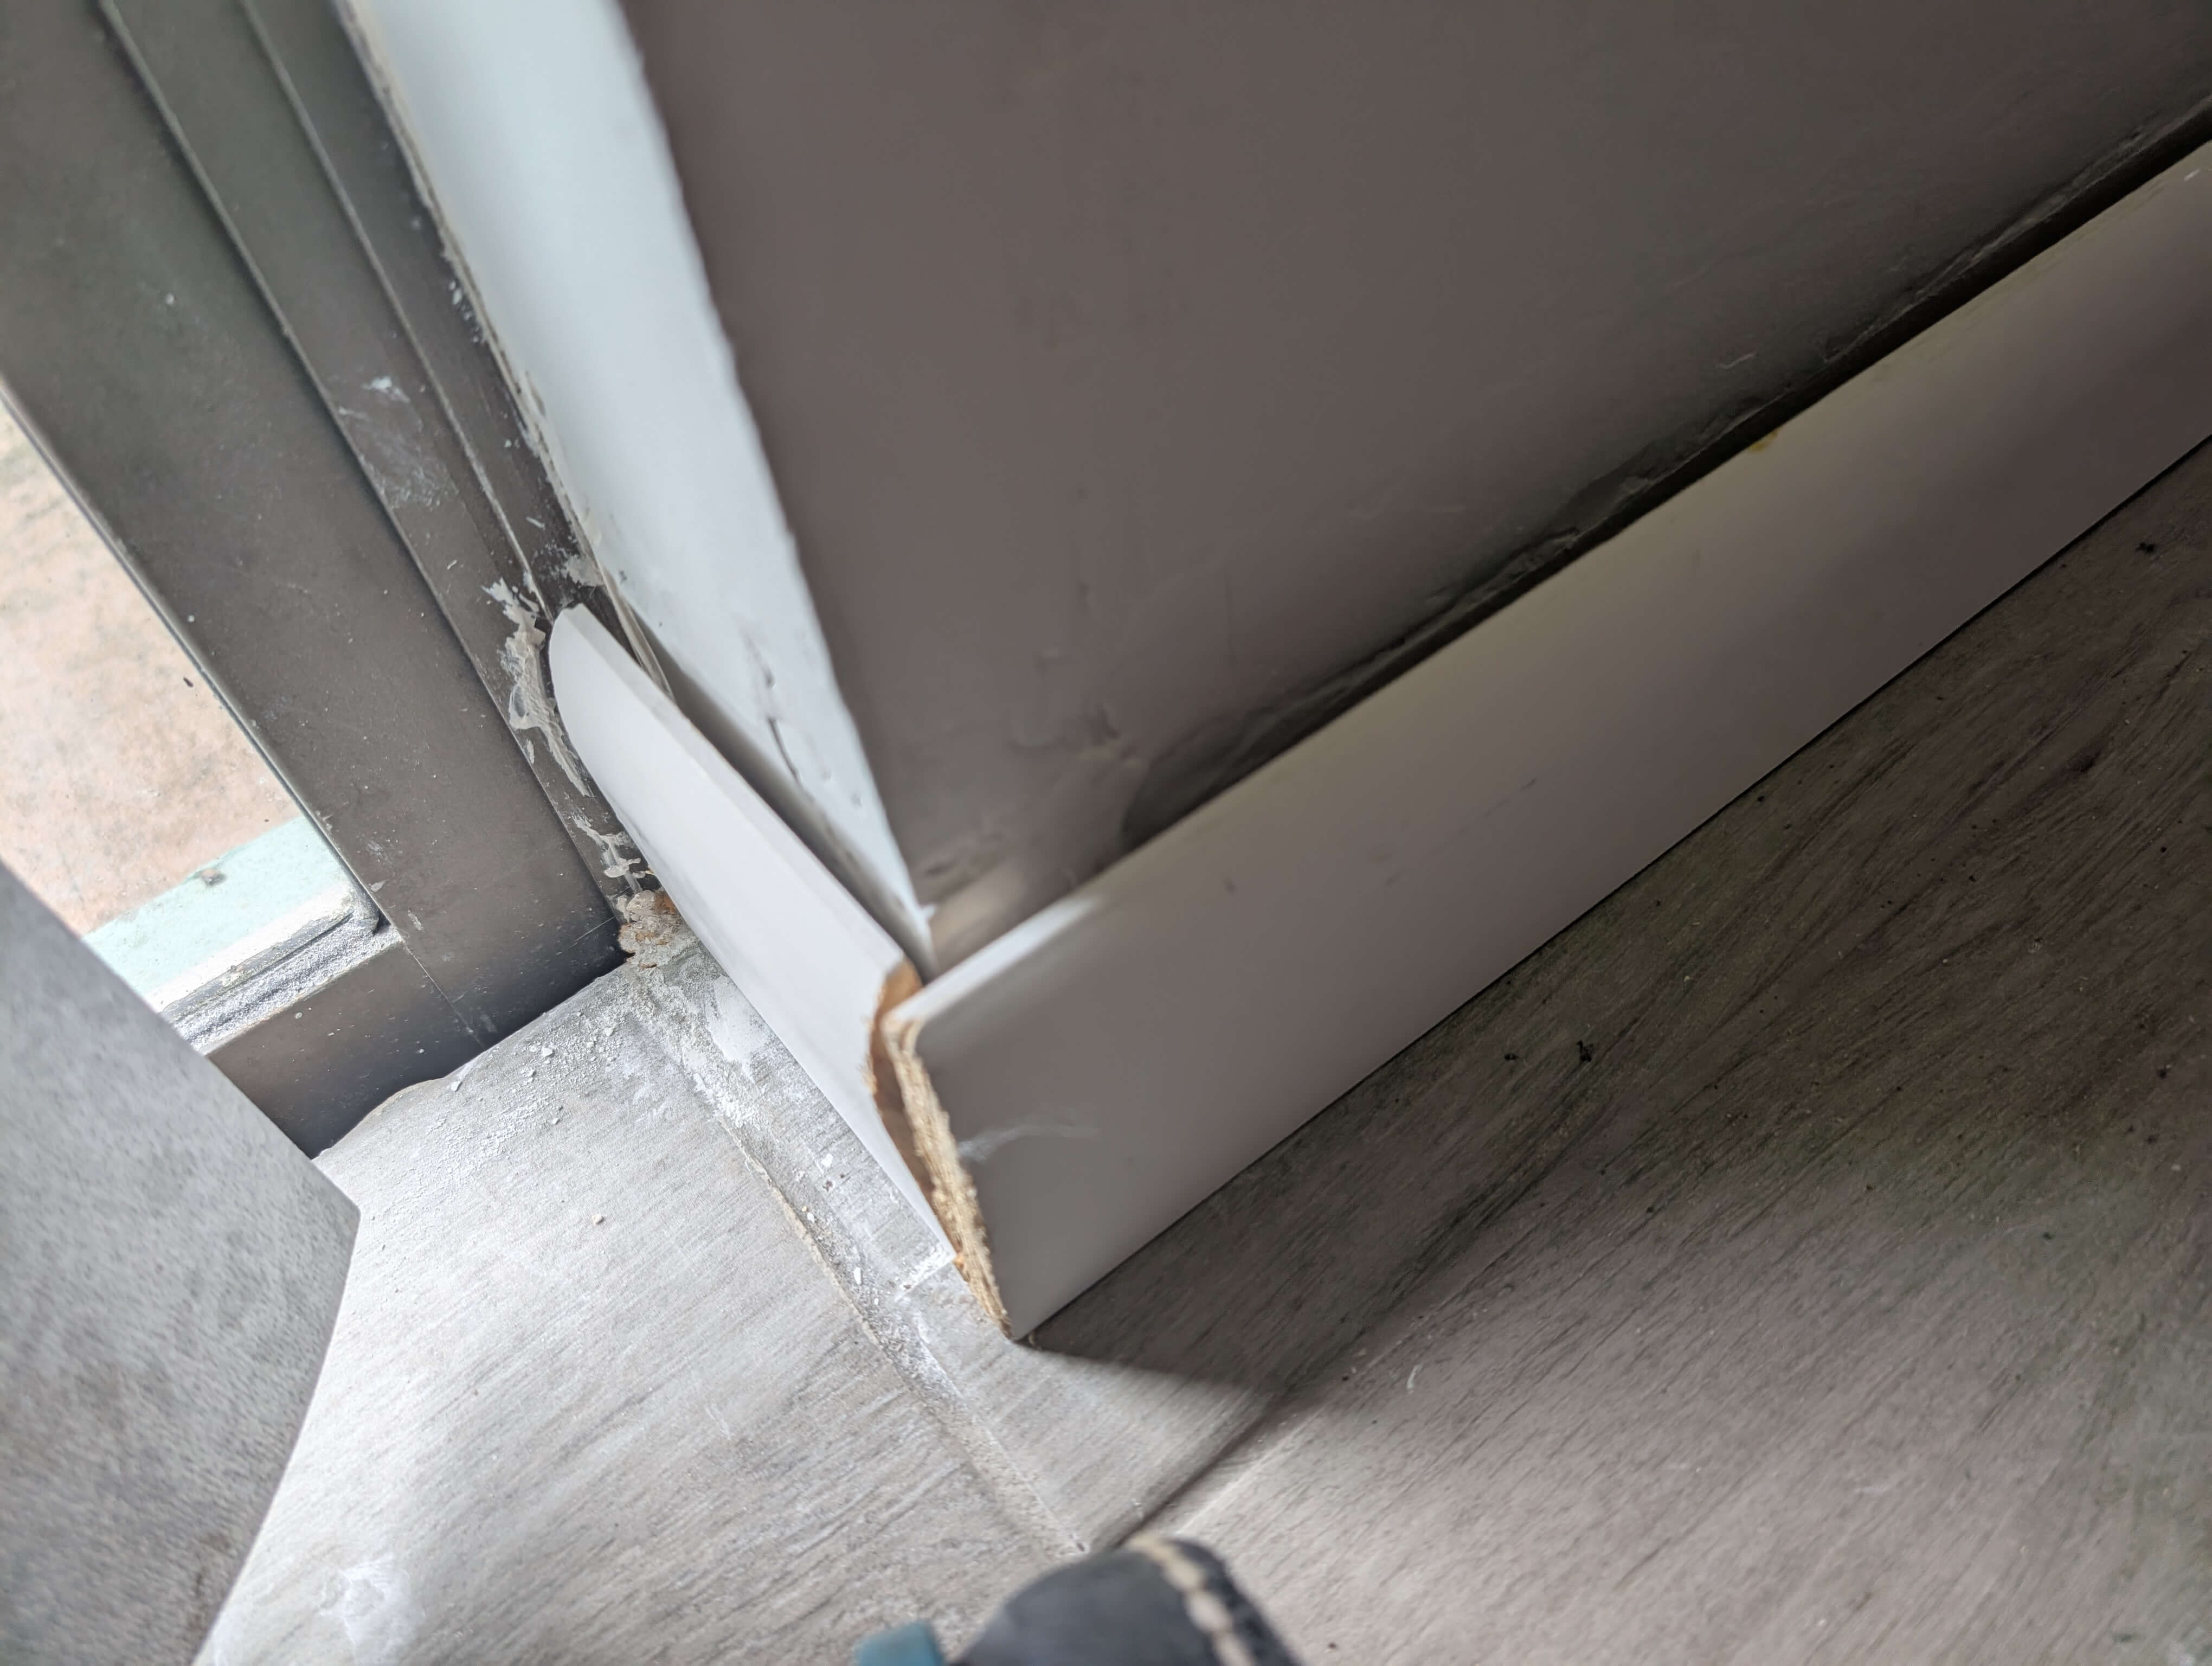
Of course knowing our luck and inexperience things did not line up and it took us some work carefully cutting and sanding boards until things were perfect. We hammered in some screws which once again would have been easier with a nail gun, but we persisted onward.
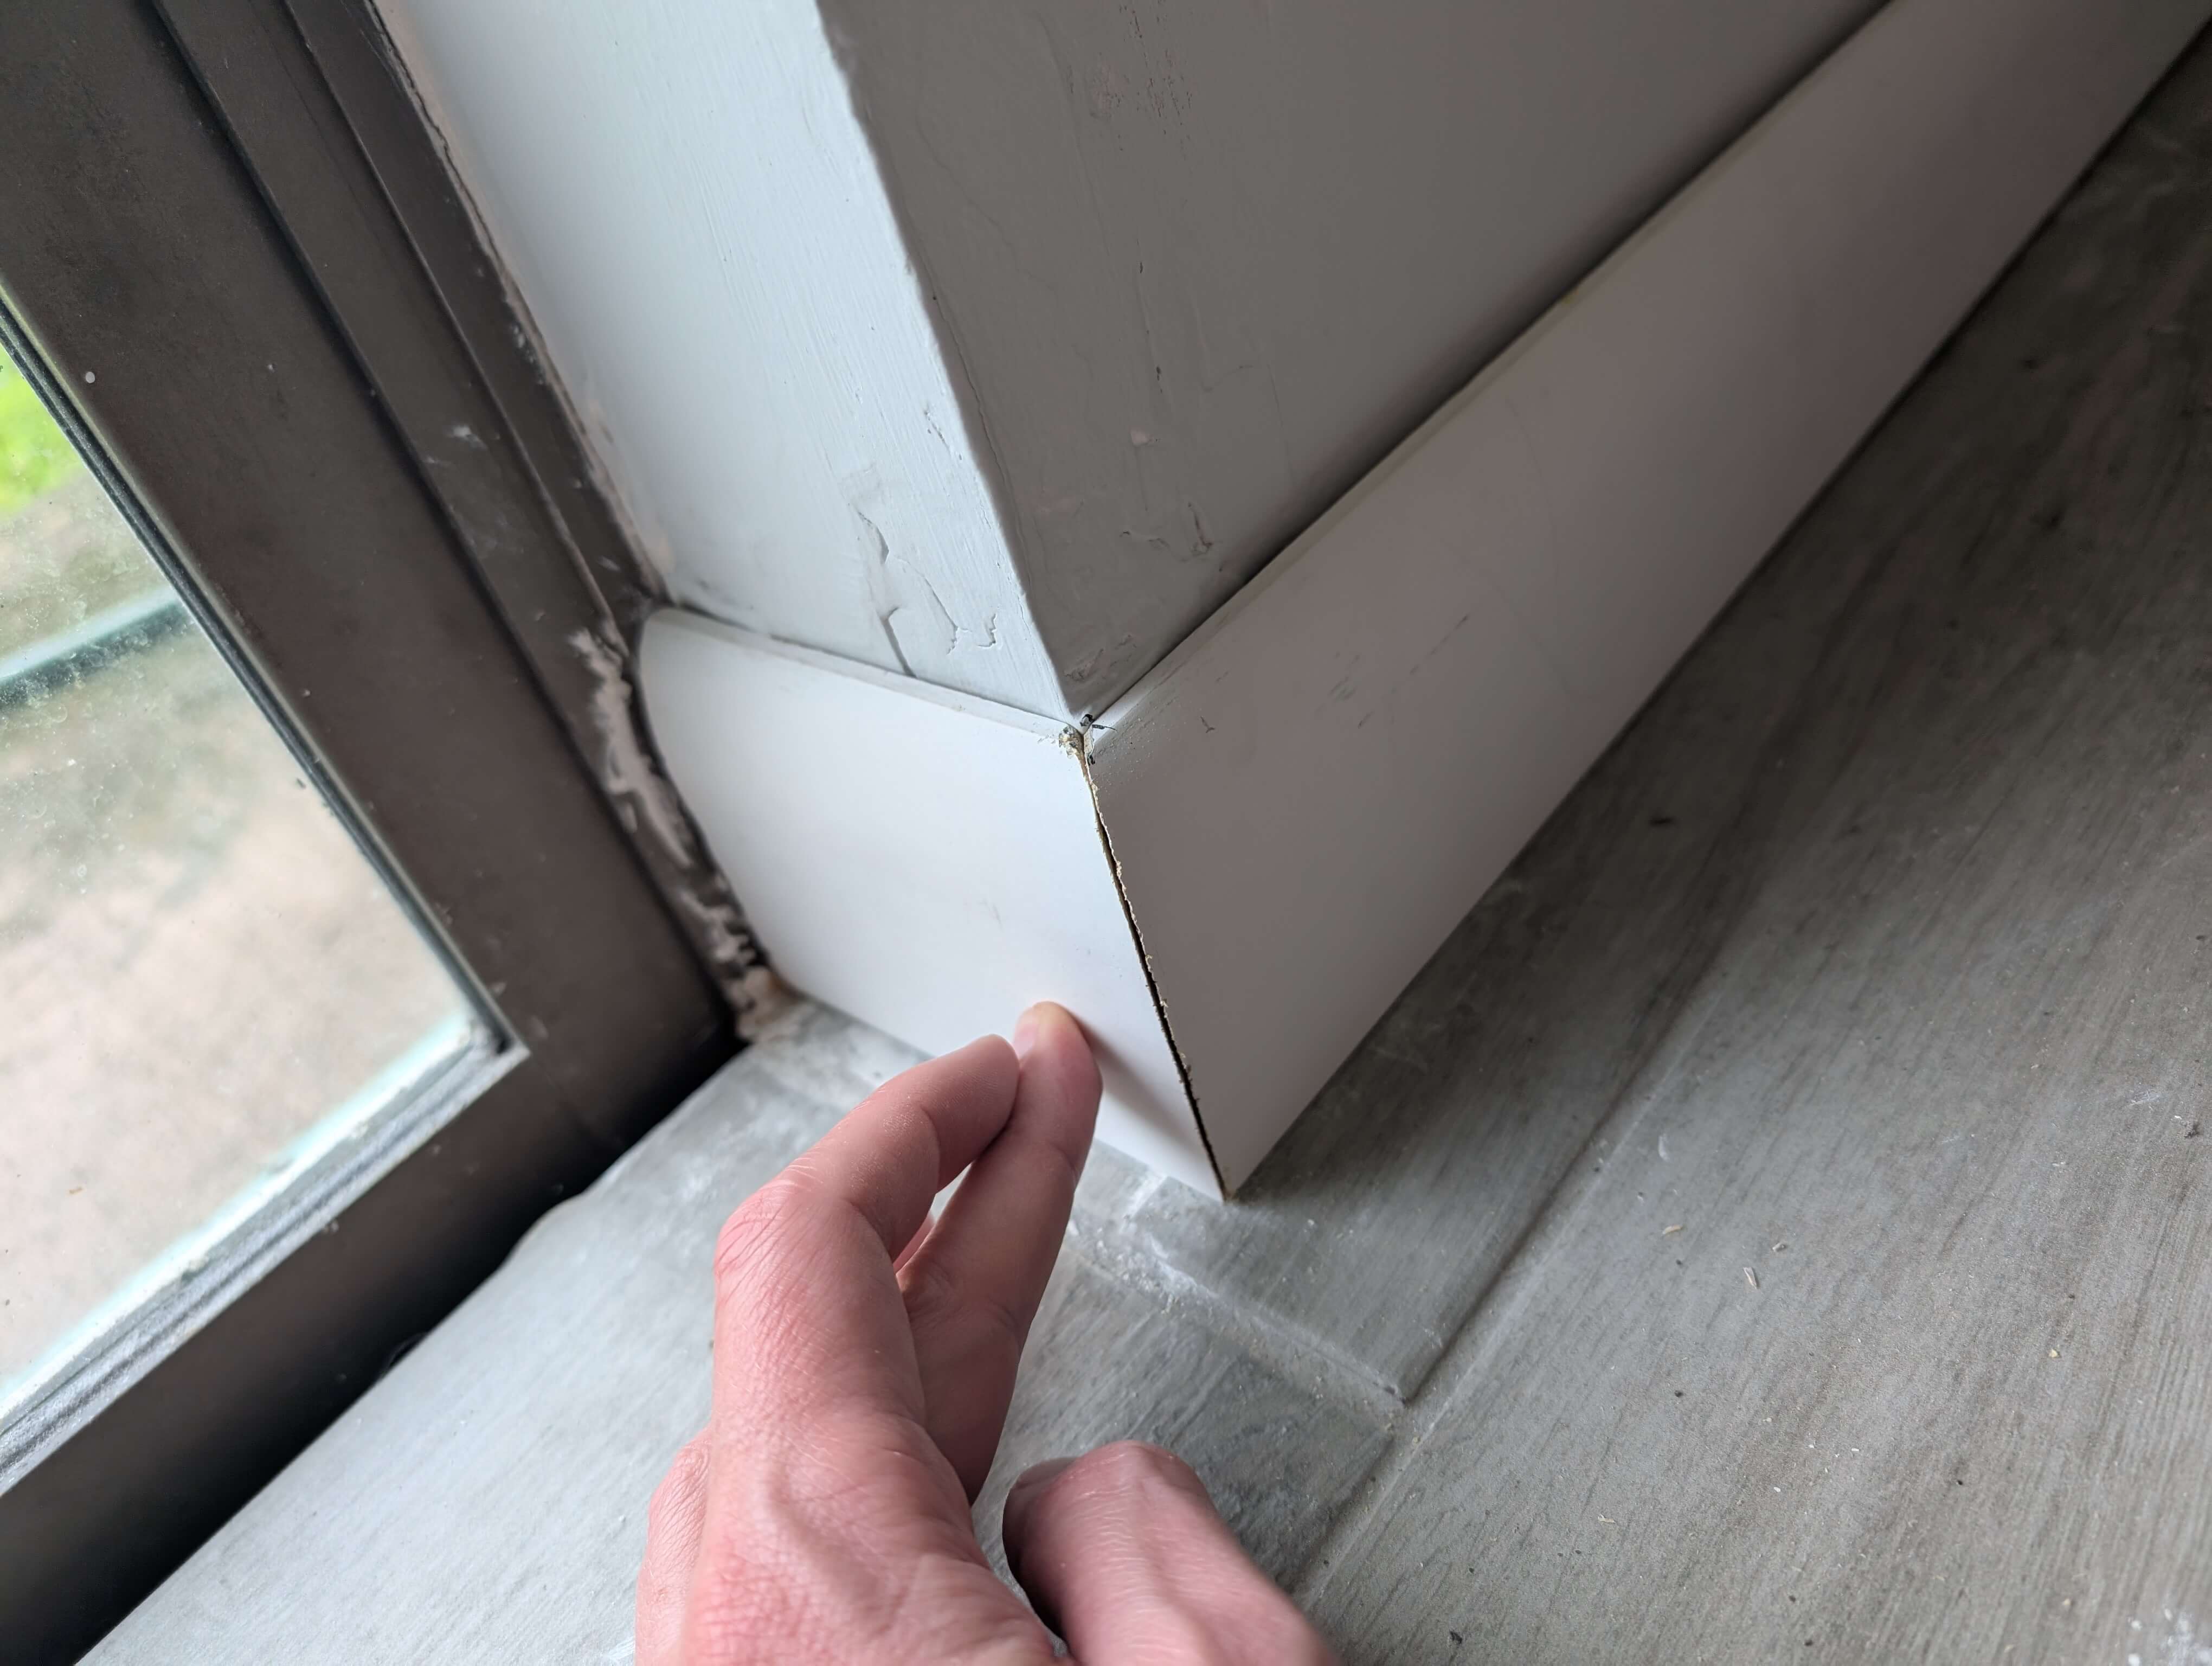
I wish it was as easy as typing this blog, but the amount of times I cut the angle the wrong direction and had to re-cut was an embarrassing two times. However when all the pieces lined up perfectly to be nailed in it was a relief that this project was finally nearing the end.
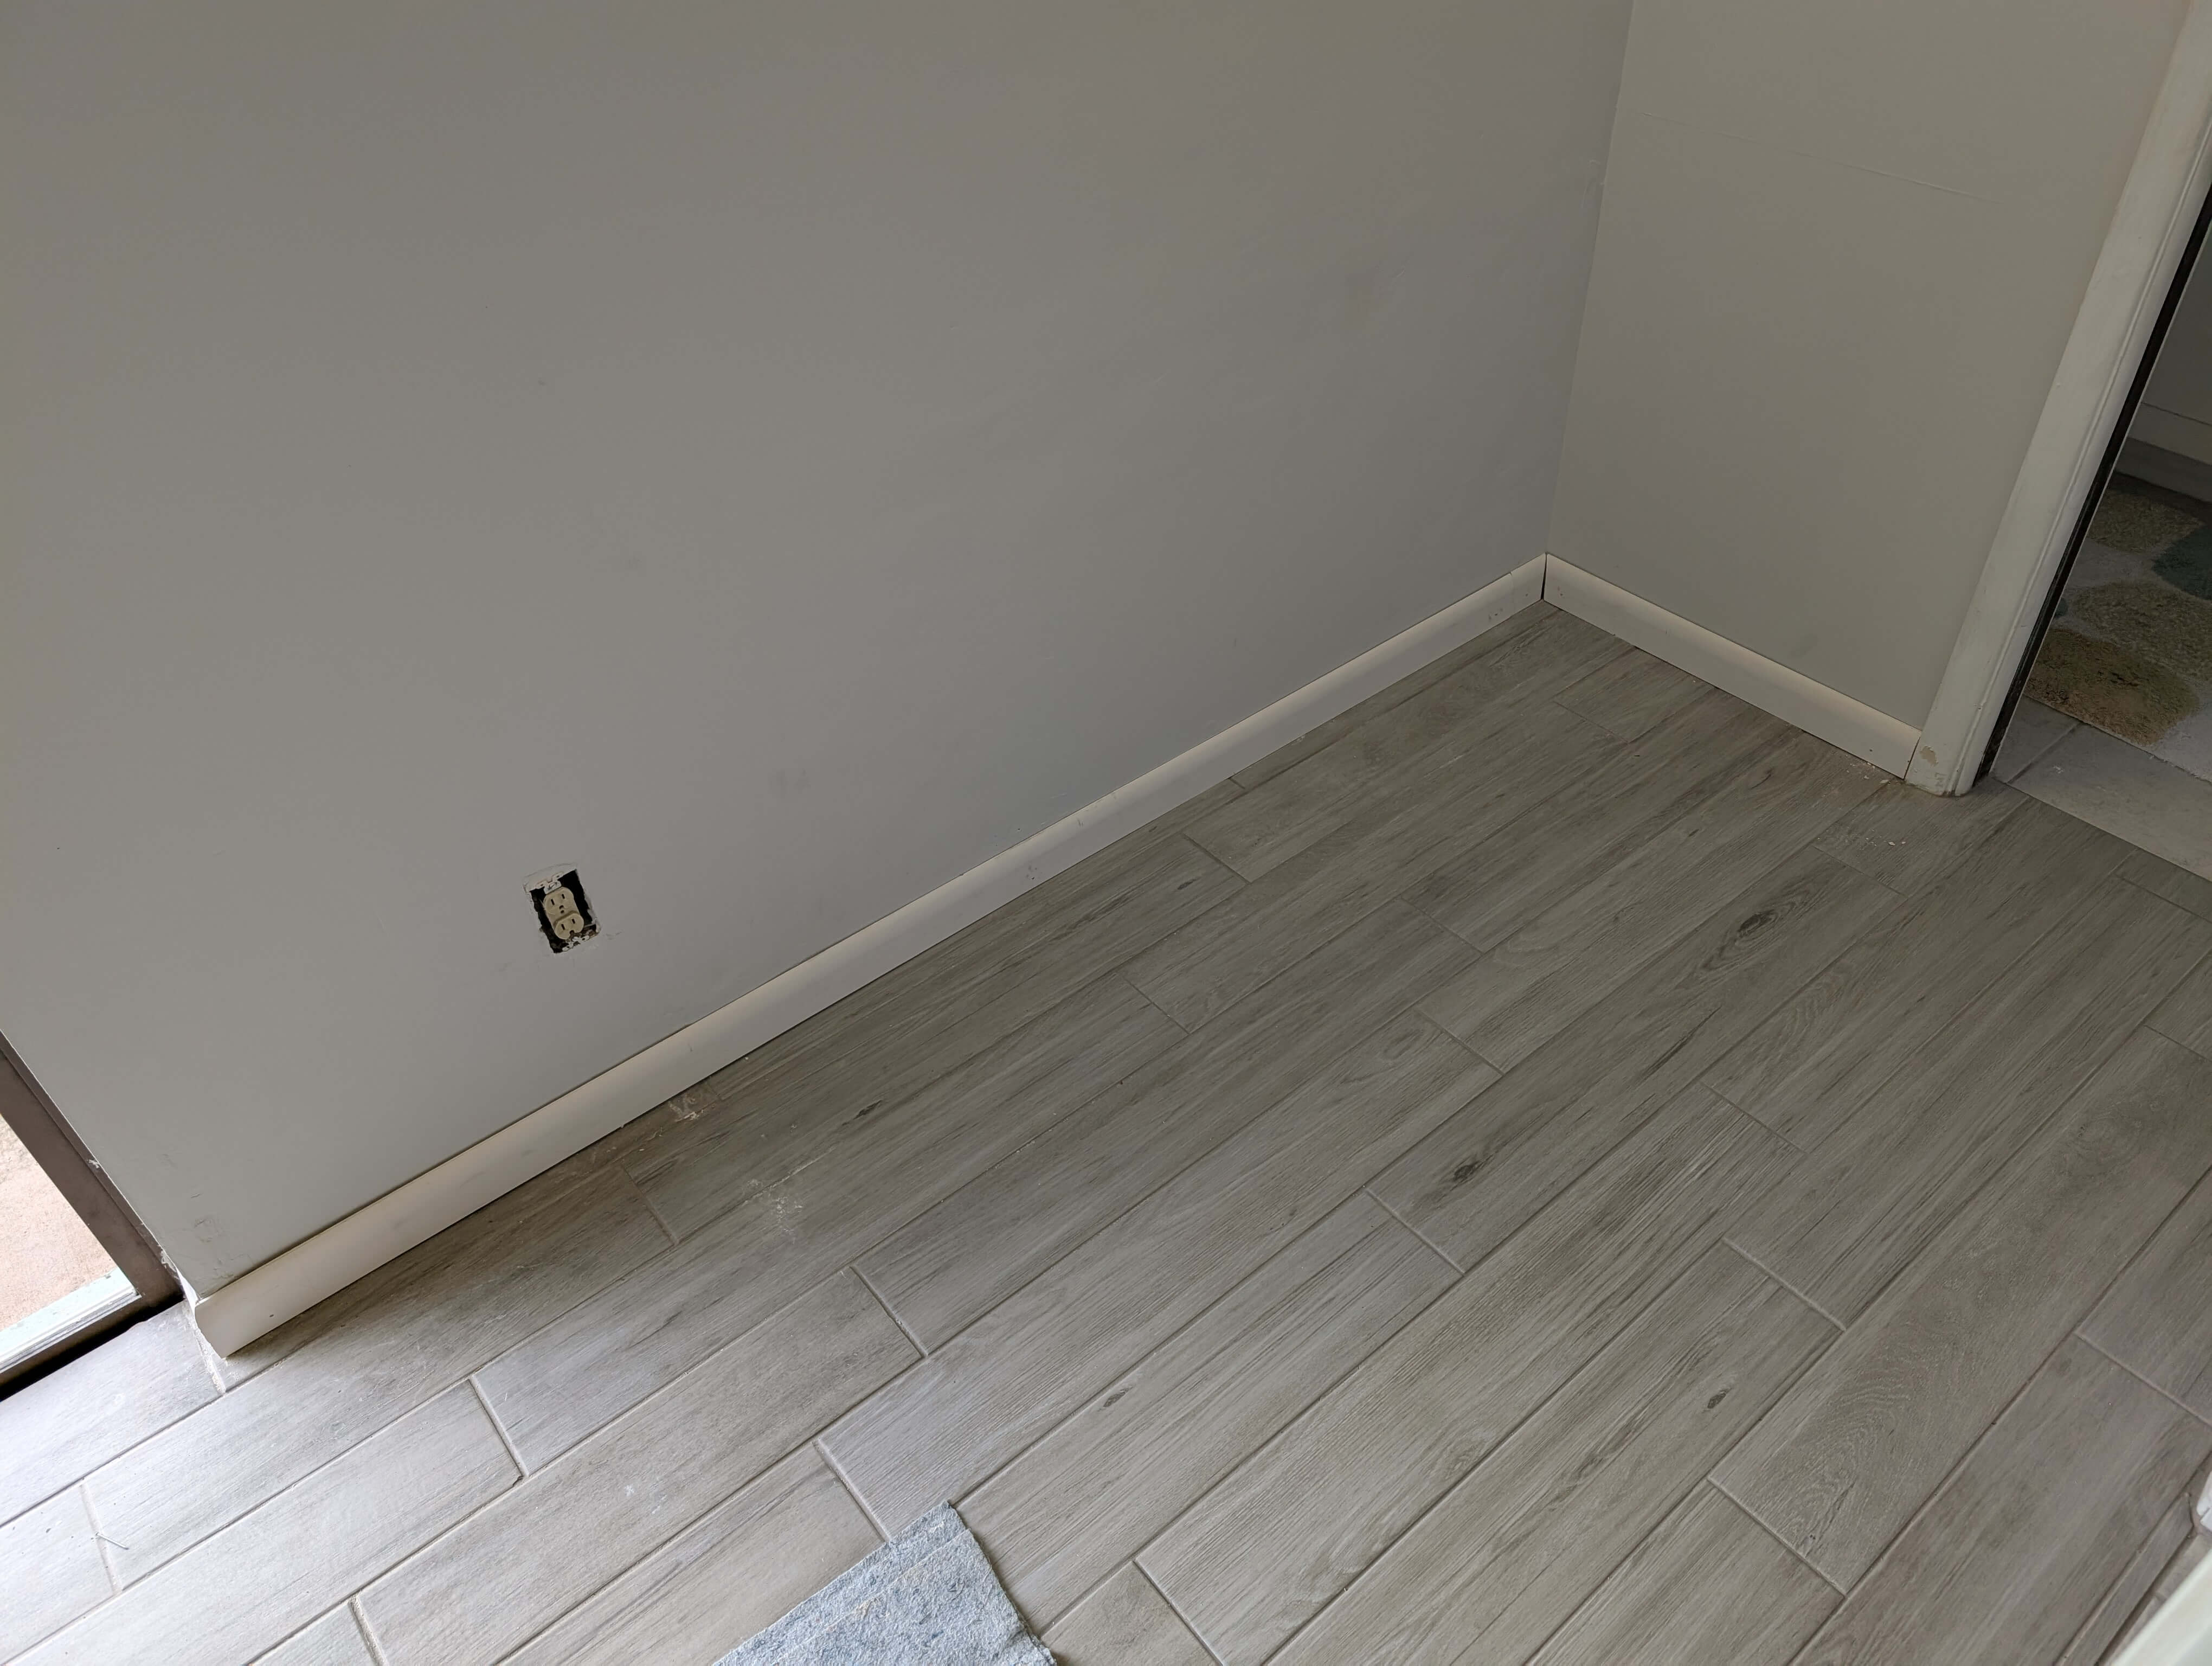
We now had the vanity & mirror removed, all the tile replaced, base boards replaced and the wall patched and painted. From a distance the corner and area looked perfect and we were finally ready to built the closet.
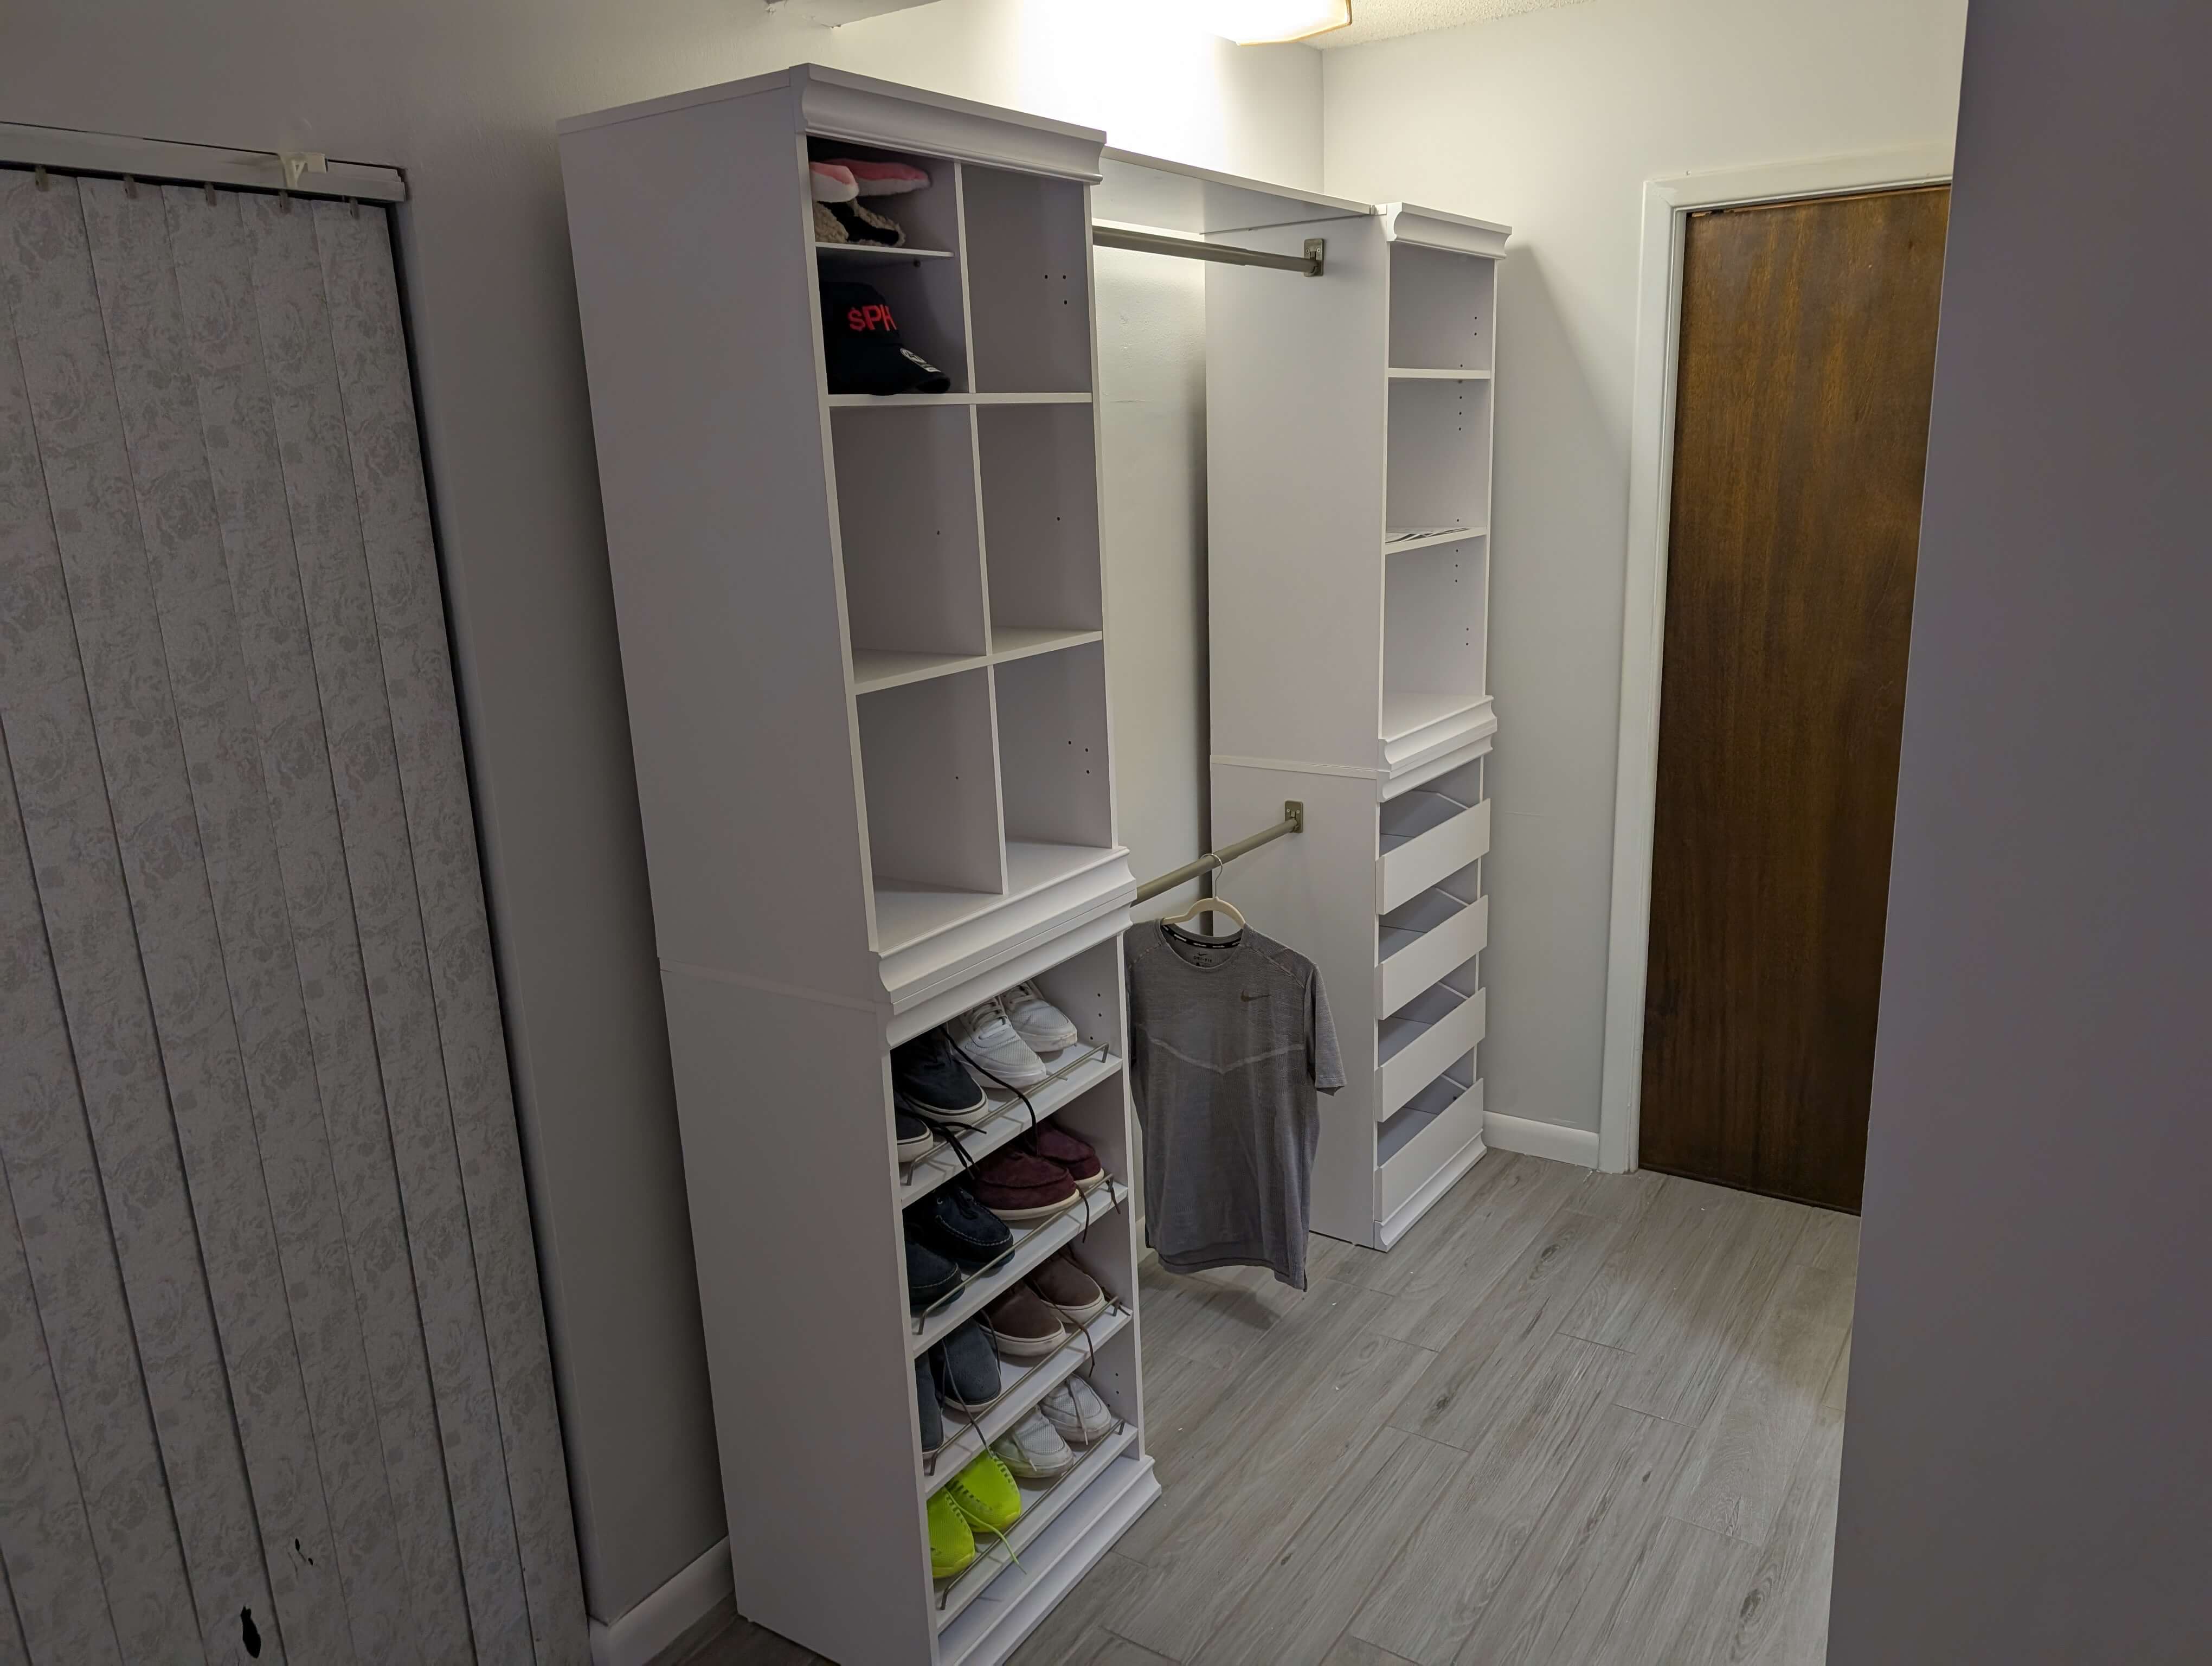
A bit nervous with the height measurement as it neared completion, but we measured the area to ensure a purchased closet would fit prior to purchase. It was an insane amount of screws manually screwed in, but finally our summer project was completed. With how much space the closet covers no one can see the little imperfections we caused with our inexperience which made us feel better.
Hopefully our next house project does not take this long.