Deploying Laravel with GitHub Actions
After my 9th or 10th hobby Laravel project, I've noticed that there is a mix up of available easy steps for automating the deployment process. This is a mini guide to make this easier.
I enjoy a simple process that allows a project to deploy with the ease of use of a simple tag push. This method might not be applicable to every specific situation, but for mine pushing a tag is a perfect method to kick off a release.
So to start - lets pretend we have just pushed a tag doing something like:
git tag -a v1.0.0 -m "initial release" -s
git push origin v1.0.0
This snippet basically creates a signed commit called v1.0.0 and pushes it. With a simple GitHub Action that reacts to this tag push, we will have a small file like.
on:
  push:
    branches-ignore:
      - '**'
    tags:
      - v*

jobs:
  deploy:
    runs-on: ubuntu-latest

    steps:
      - uses: actions/checkout@v2

      - name: Deploy
        uses: deployphp/action@v1
        with:
          private-key: ${{ secrets.DEPLOY_SECRET_KEY }}
dep: deploy -vvvIf we follow that snippet about from top to bottom we see:
- An initial
onrule that specifies us to ignore any branch name and only react to any tag pushed that starts with the lowercase letterv - Next up we have
jobs, which only has one calleddeploy - We run on the latest Ubuntu, which is a safe bet when deploying PHP
- We checkout the repository
actions/checkout@v2so we have the project available. - We use a GitHub Action from Deployer itself to kick off the deployment
- We specific verbose
-vvvon the command to make debugging easier.
So you'll immediately see that private-key is a required variable. So this is our first stop point. You'll want to imagine how this software is getting deployed to a server. This will hopefully be a non-root user for proper security measures.
If this part seems unfamiliar, I recommend reading up on ssh-keygen as you'll be creating a keypair ssh-keygen -t rsa -C 'deployer@{domain}. You'll then want to allow that new keypair to connect to the server itself. This can be broken down to basically adding the public key into the authorized_keys file on the server and user.
leafapp@leafapp.co [~/.ssh]# ls | grep 'id_rsa'
id_rsa
id_rsa.pub
leafapp@leafapp.co [~/.ssh]# cat authorized_keys | grep 'leafapp'
ssh-rsa AAAAB3NzaC1yc2EAAAADAQABAAABAQCt/uCEjylZwPCl4MYcJcm4Ypq3BVo/TDiV9ktE0mE9WZCVHjaVYOI96WWjtBfdg9cZei7HLJpDiaJz7ADOpxZYOOL1kZpXeUbX8wQKK96Zy0+kjPaSYRq1qDfbKxNMKYF9KDQ0eL9wKJnBaDpiTHhK8+ME397q4D2Xw0B1DCWVR4xXgI+IEWEtUp97yS/P1w1QkzW8rOm/YQkXGW+fb3LF2bgCPRVjsHL3N7h0hBPexiNjZqQGI0Bi2kfhSK60TKkqzGpVAp4U1h6iTsdGd2OrXVa+mxofSUu3h32Rd77RmW9Jn0ToMAOfkTDxPuRJ9/UoszJI7EepoannlCdXJyVV leafapp@leafapp.co
So this snippet above basically shows that the corresponding private key to that public key is allowed to SSH onto this server without a password becoming the leafapp user.
Now take that private key and store it securely into GitHub Action secrets. Note that depending on your setup - this should probably use the Deployments feature of GitHub Actions for hardening the infrastructure.
Now when the deployment starts - Deployer needs to know what to do and this is where the deploy.php or deploy.yaml comes into play.
A quick note - I would recommend using the php version of the configuration file. The YAML file has had issues that are not apparent in the PHP one.
There is a wonderful site for Laravel for a starting point by Lorislevia here to grab as a starting point.
<?php

namespace Deployer;

require 'recipe/laravel.php';
require 'contrib/php-fpm.php';
require 'contrib/yarn.php';

set('application', 'Leafapp');
set('repository', 'git@github.com:iBotPeaches/LeafApp_Infinite.git');
set('php_fpm_service', 'ea-php81-php-fpm');

host('prod')
    ->set('remote_user', 'leafapp')
    ->set('port', 22774)
    ->set('hostname', 'leafapp.co')
    ->set('deploy_path', '/home/leafapp/deploy');

task('deploy', [
    'deploy:prepare',
    'deploy:vendors',
    'artisan:storage:link',
    'artisan:view:cache',
    'artisan:config:cache',
    'artisan:migrate',
    'yarn:install',
    'yarn:run:prod',
    'deploy:publish',
    'php-fpm:reload',
    'artisan:queue:restart',
]);

task('yarn:run:prod', function () {
    cd('{{release_or_current_path}}');
    run('yarn run prod');
});

after('deploy:failed', 'deploy:unlock');
Lets break down this file like the last.
- We start off with a namespace and importing the files we need. These can be found in either the recipes or contribs section of Deployer to perfect your build.
- Next up we set some variables to override some sections of the project. You'll need
applicationandrepository, but I include an additional one to help me properly restart PHP FPM. - After this we want the host setup, which can be quite powerful between environments or multiple servers. For the case of this project, we have 1 server and one environment. You setup the configuration for that server, which should align with the private/public key you created earlier.
- Now we setup the tasks to do during
deploy. The defaults might be sane here, but we have to do some additional checks with yarn and queues so we duplicate the list to properly order the events. - We then create a new custom task for building yarn assets. This is required because as of this blog post - Deployer only has helpful rules for NPM.
- Finally, we unlock our deployment after it fails so we can retry again. Since a failed deployment blocking all deploys is a choice you have to make regarding your project.
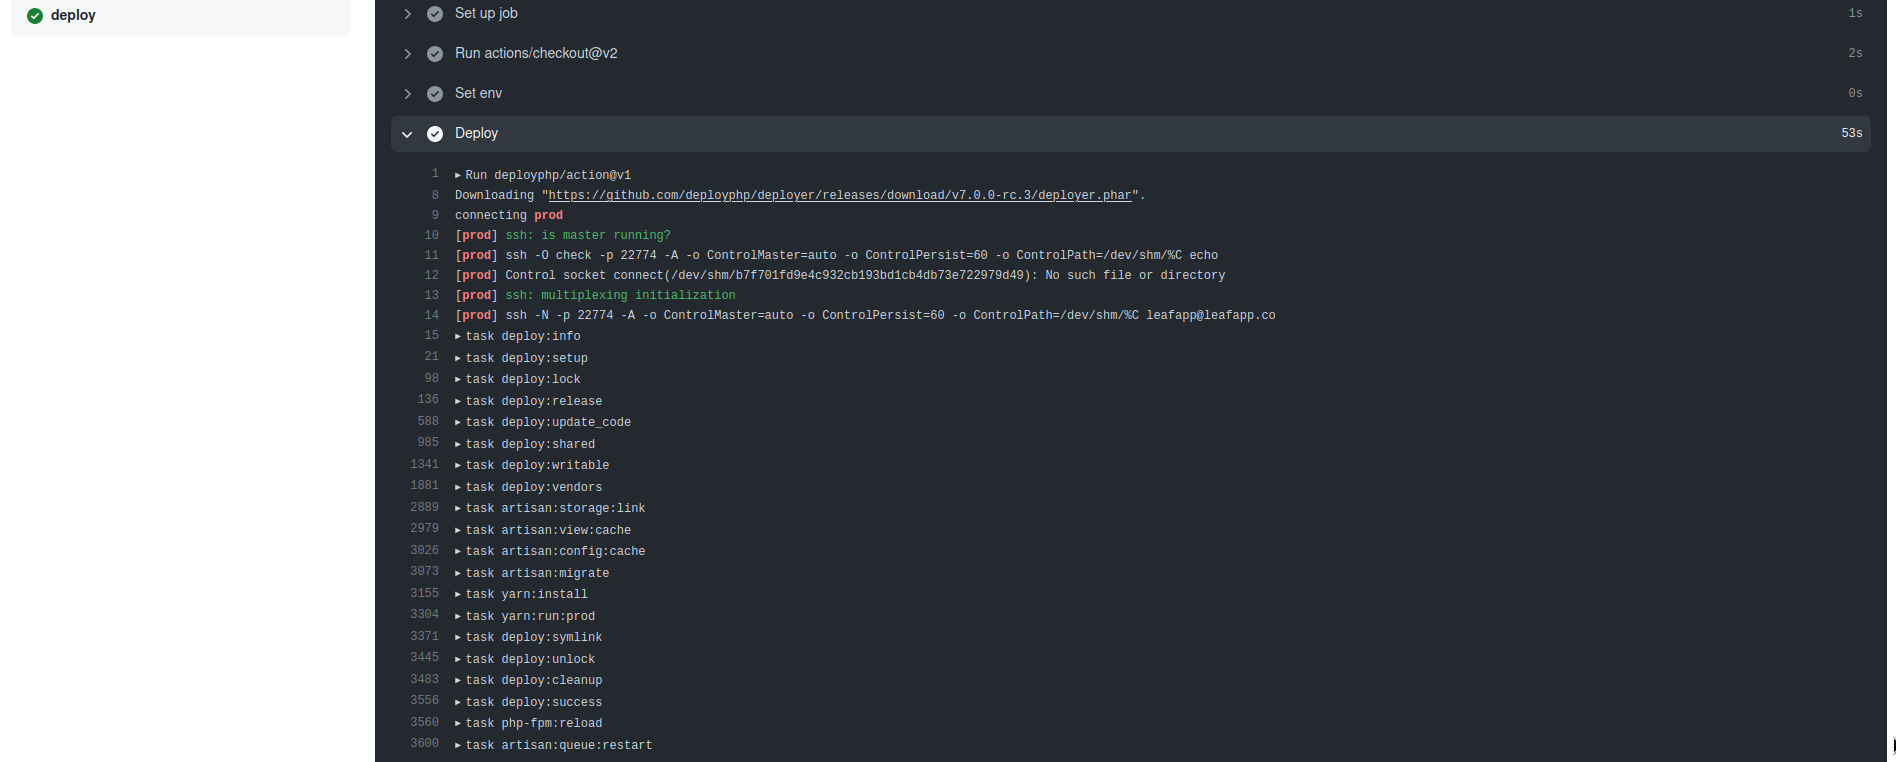
Now when we push a tag, GitHub Actions starts the process which kicks off Deployer. Deployer runs through this configuration file and deploys it.
It setups a common folder setup of:
currentreleasesshared
So as Deployer runs it creates a new release in releases and once that is finalized. A quick symlink is changed so current points to the newly deployed release. The shared folder is for everything shared between a release. Think your log files, environment file, etc.
So yes, the very first time you deploy you'll have an empty .env file in the shared folder. It'll be up to you to set that file up to properly represent the configurations needed on that environment.
So in under 1 minute after pushing your tag - the automation will do the rest and deploy your new version of software ready for visitors to use.